Common Tasks
How to Upload and Transcribe an Audio File
This section outlines the step-by-step process for uploading an audio file to VRBTM and initiating its transcription. This is typically the first action a user takes within a project to begin processing their audio data.
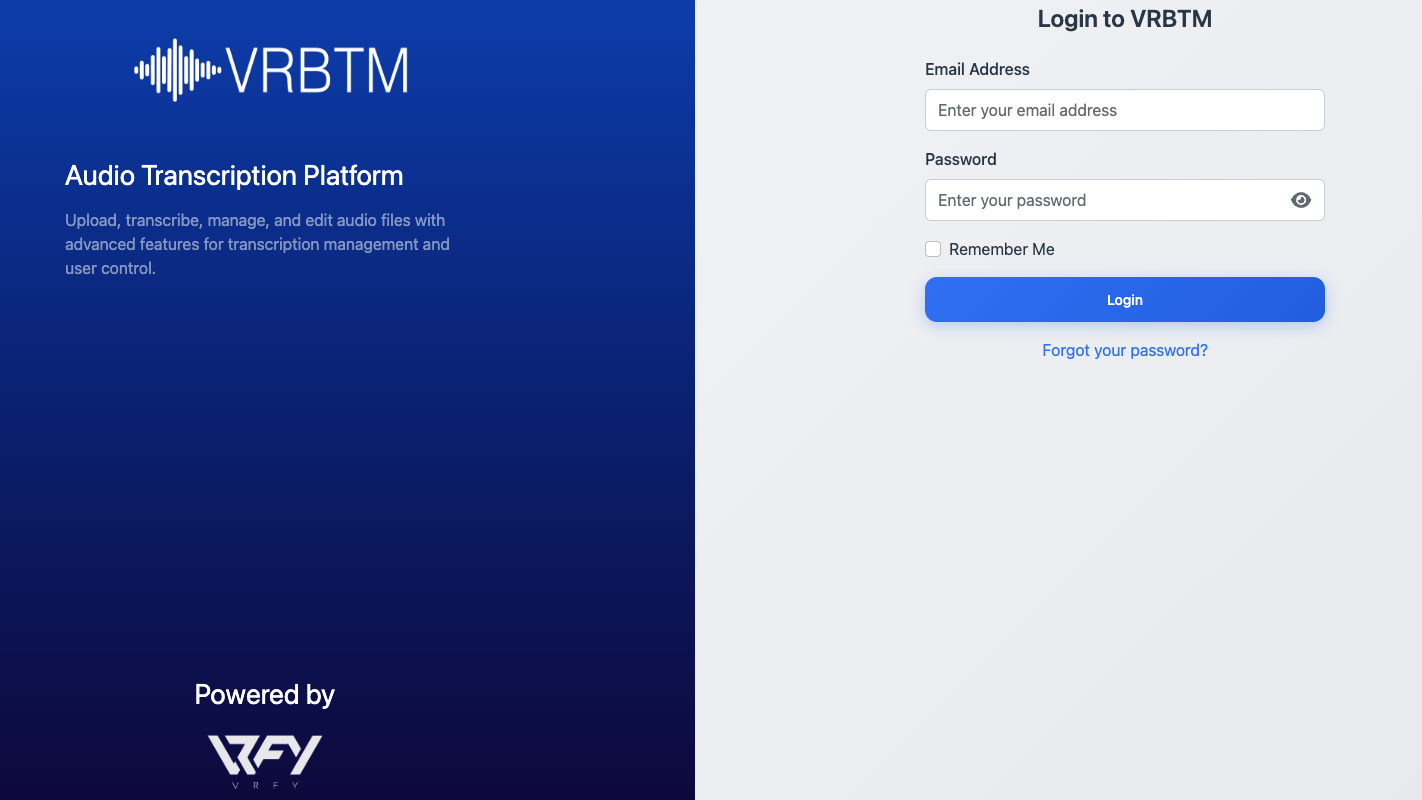
1. Log in to VRBTM: Access the VRBTM platform using your credentials.
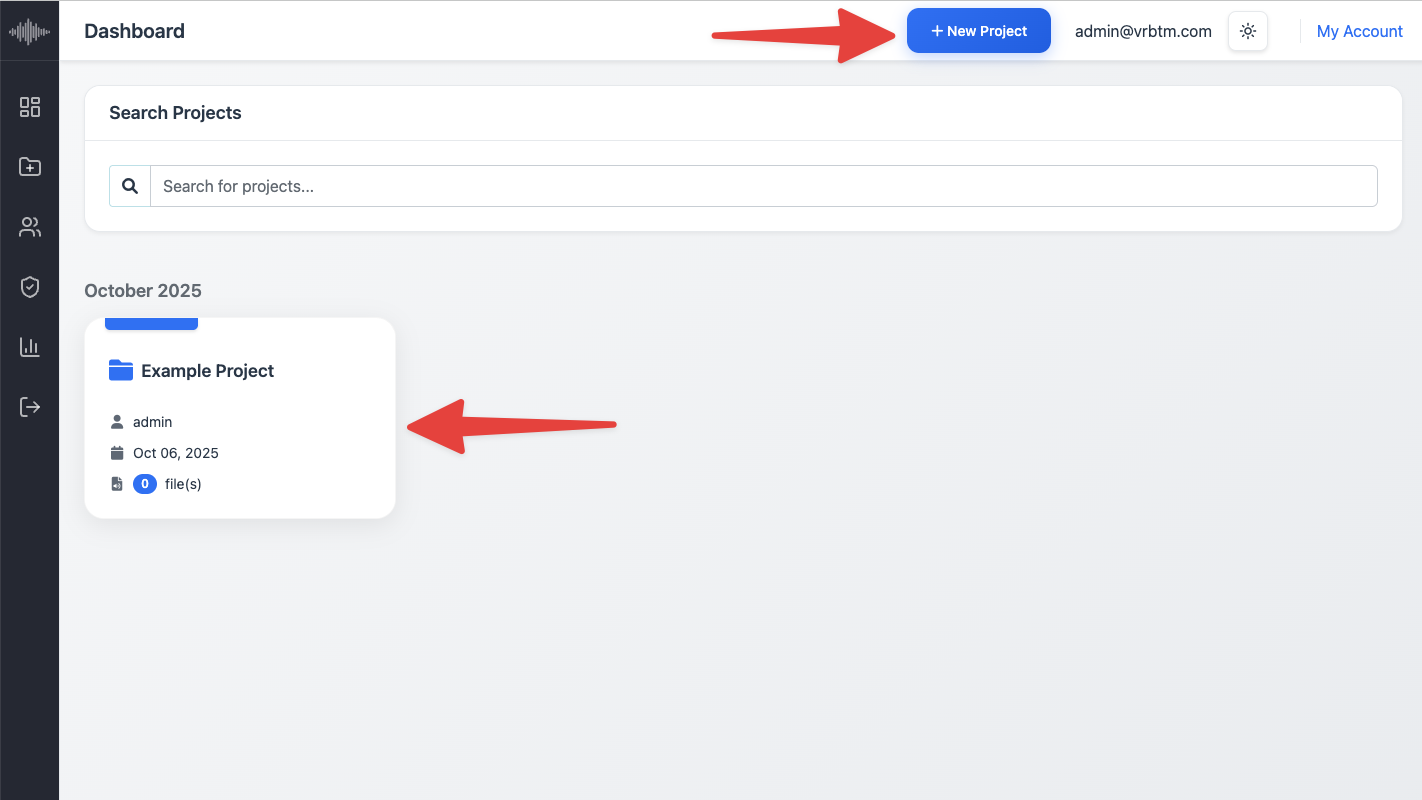
2. Navigate to Projects: From the dashboard, either create a new project or open an existing one where you wish to upload the audio file.
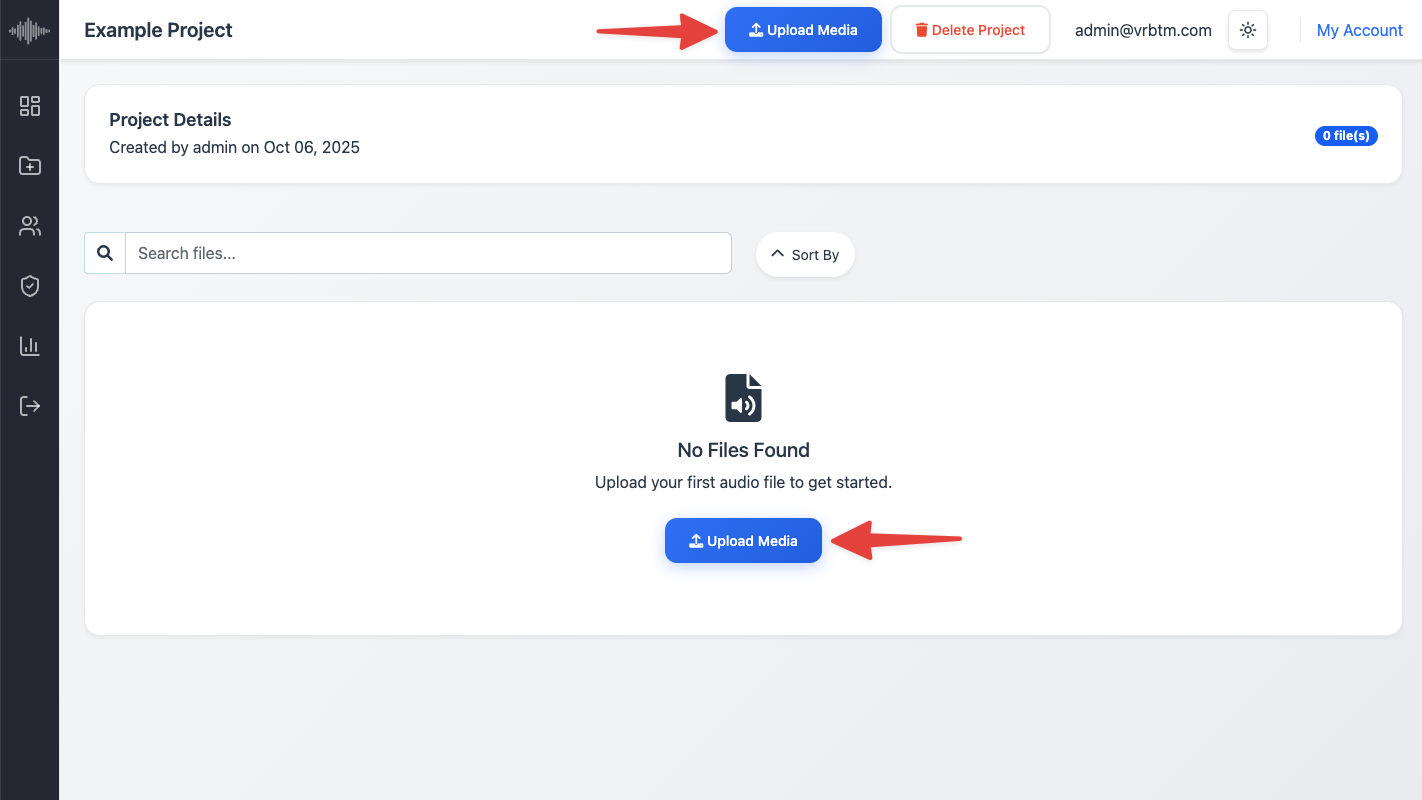
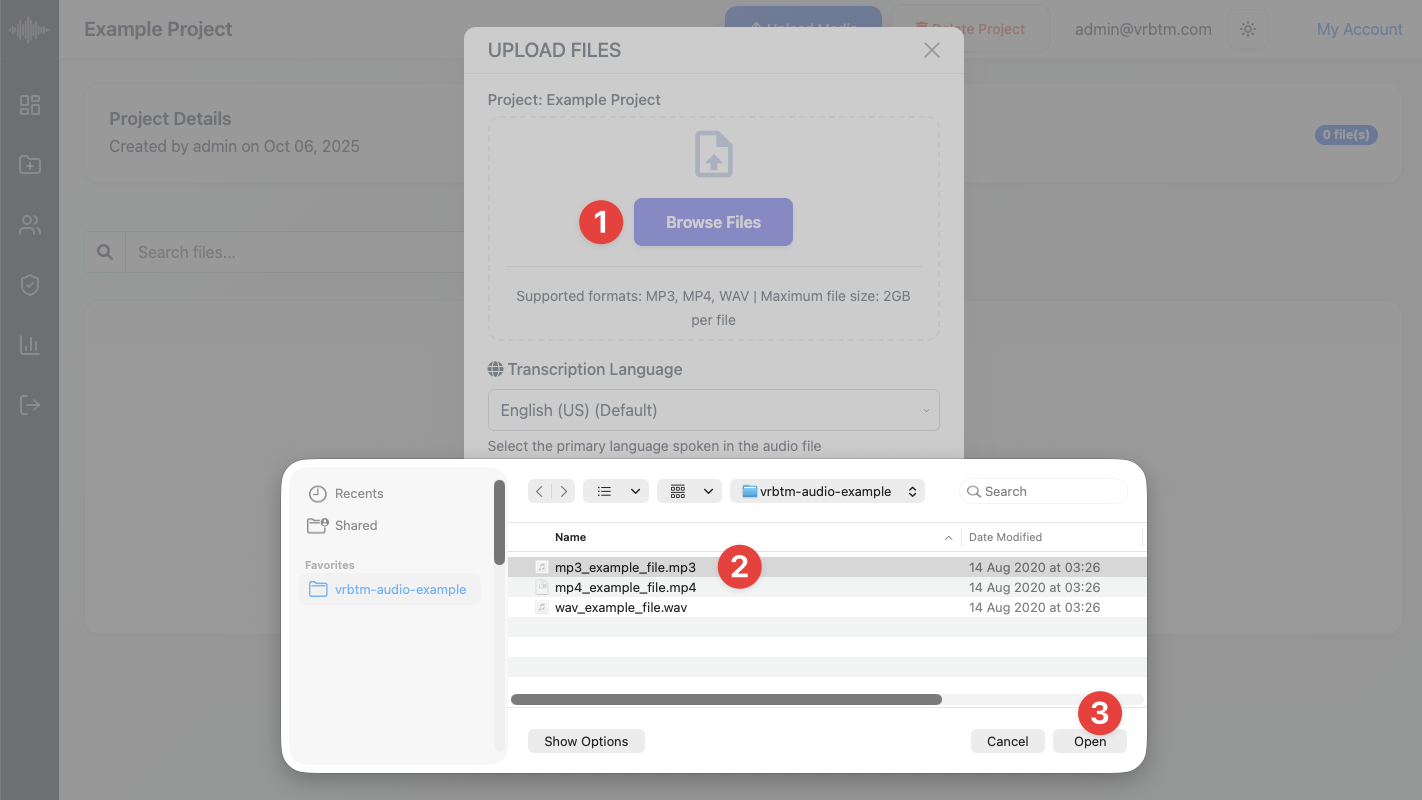
3. Initiate Upload: Click the Upload Media button within your selected project.
4. Select Audio File: A file browser window will appear. Navigate to the location of your audio file on your device and select it. Ensure your file is in a supported format (MP3, MP4, or WAV) and does not exceed 2 GB.
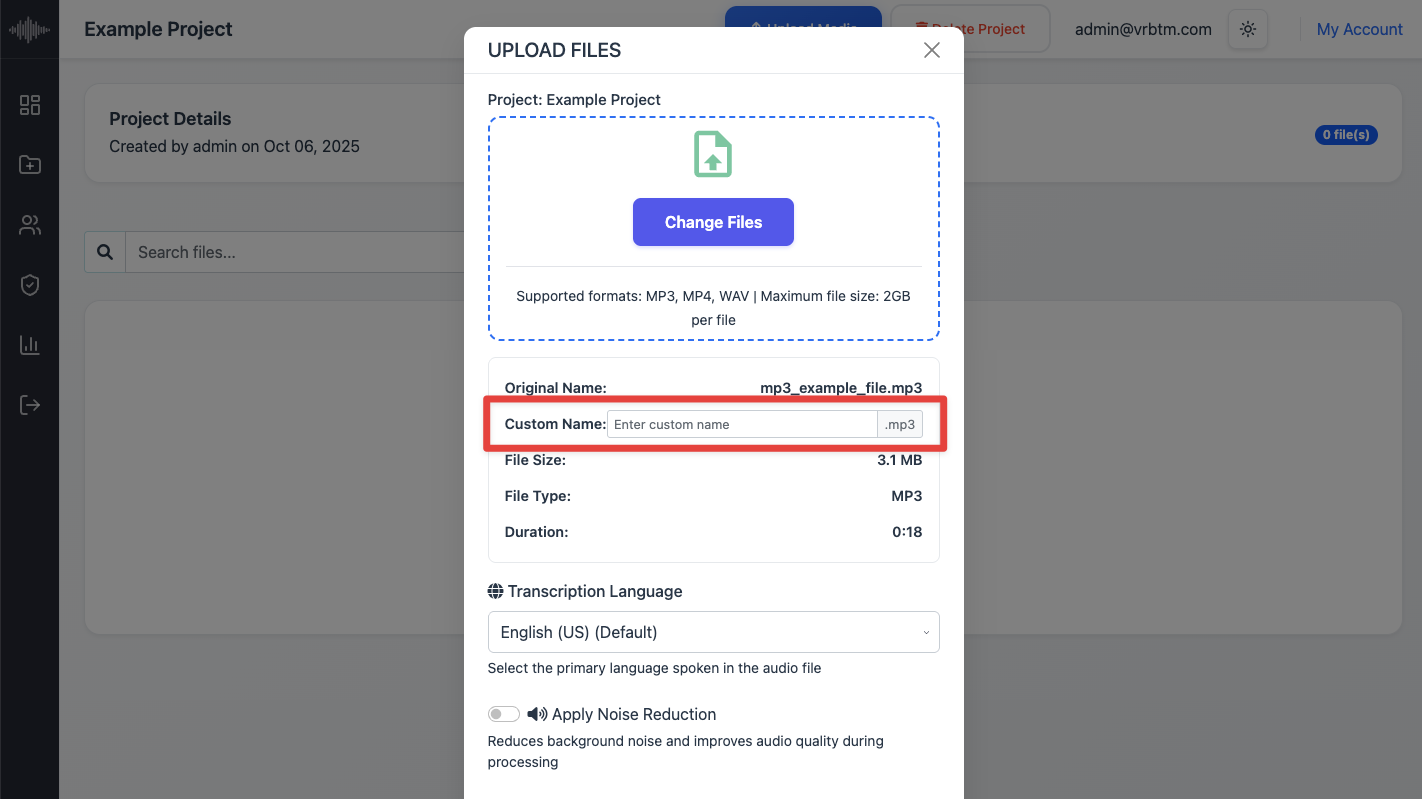
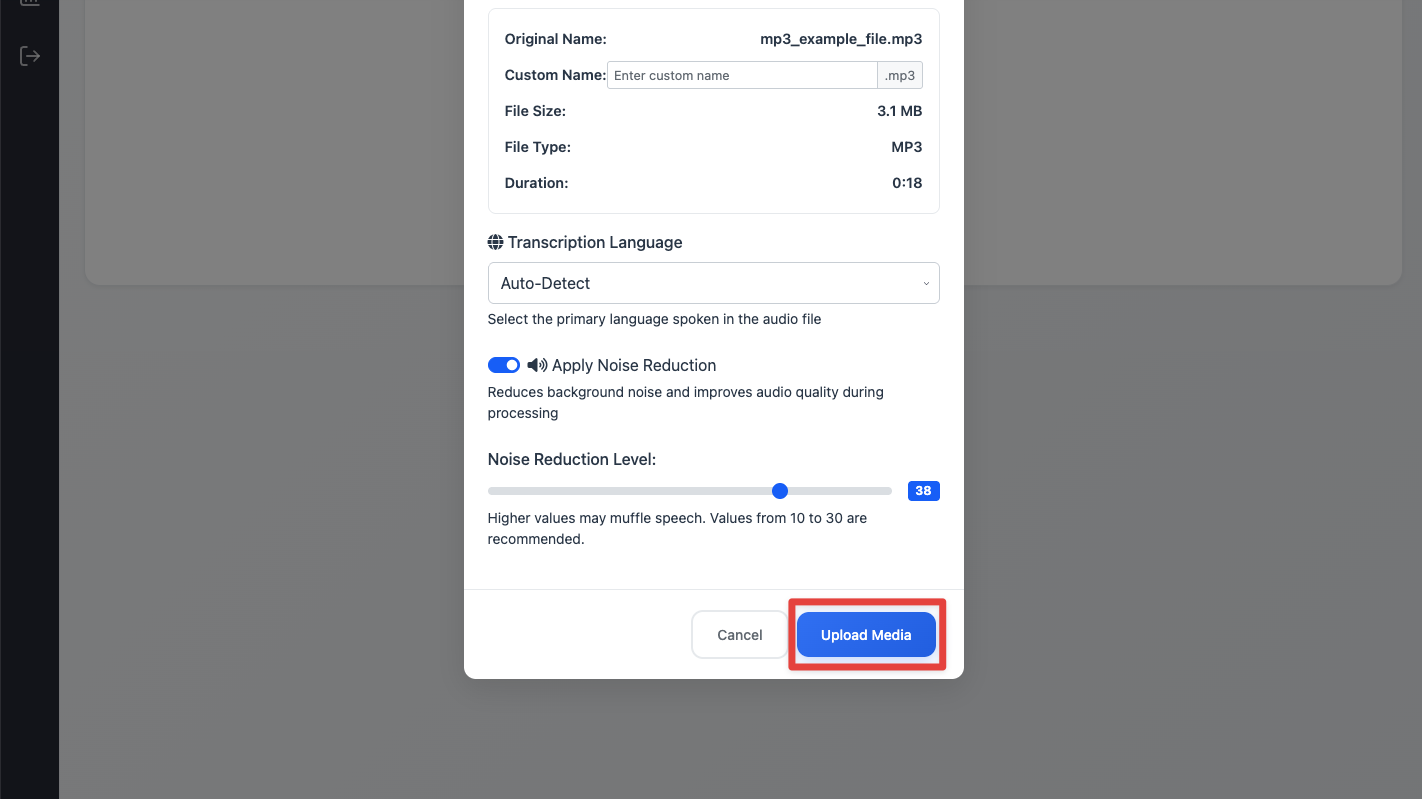
5. Custom Name (Optional): Enter a custom name for your audio file if you wish to replace the original filename. This name will appear in your project list and throughout the transcription workflow, making it easier to identify files later. If left blank, the system will automatically use the original filename as the display name.
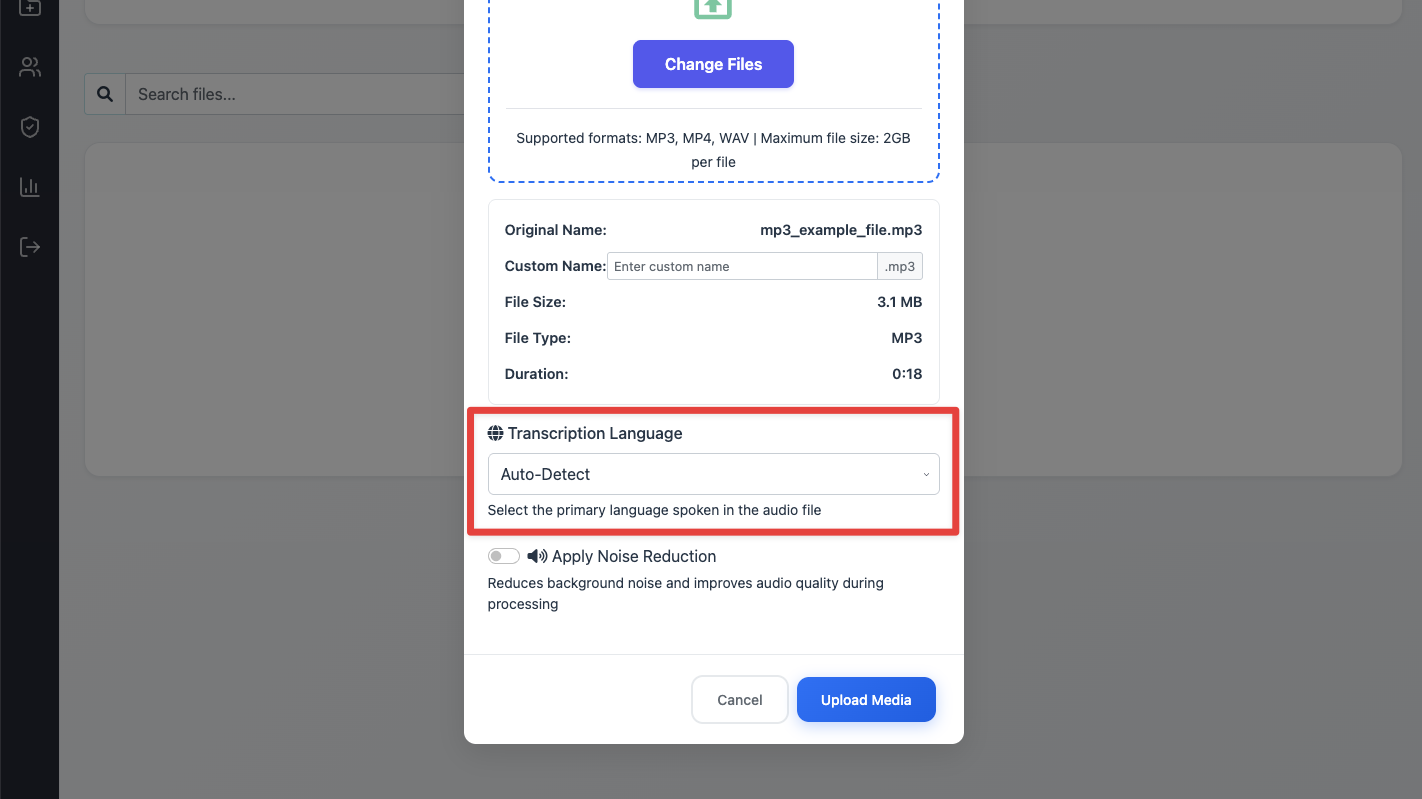
6. Select Language: Choose the primary language spoken in the audio file from the provided list of over 100 supported languages. Accurate language selection is crucial for the transcription engine to process the audio correctly. If you’re unsure of the language used in the recording, you can select Auto-Detect, and the system will automatically identify and apply the appropriate language model.
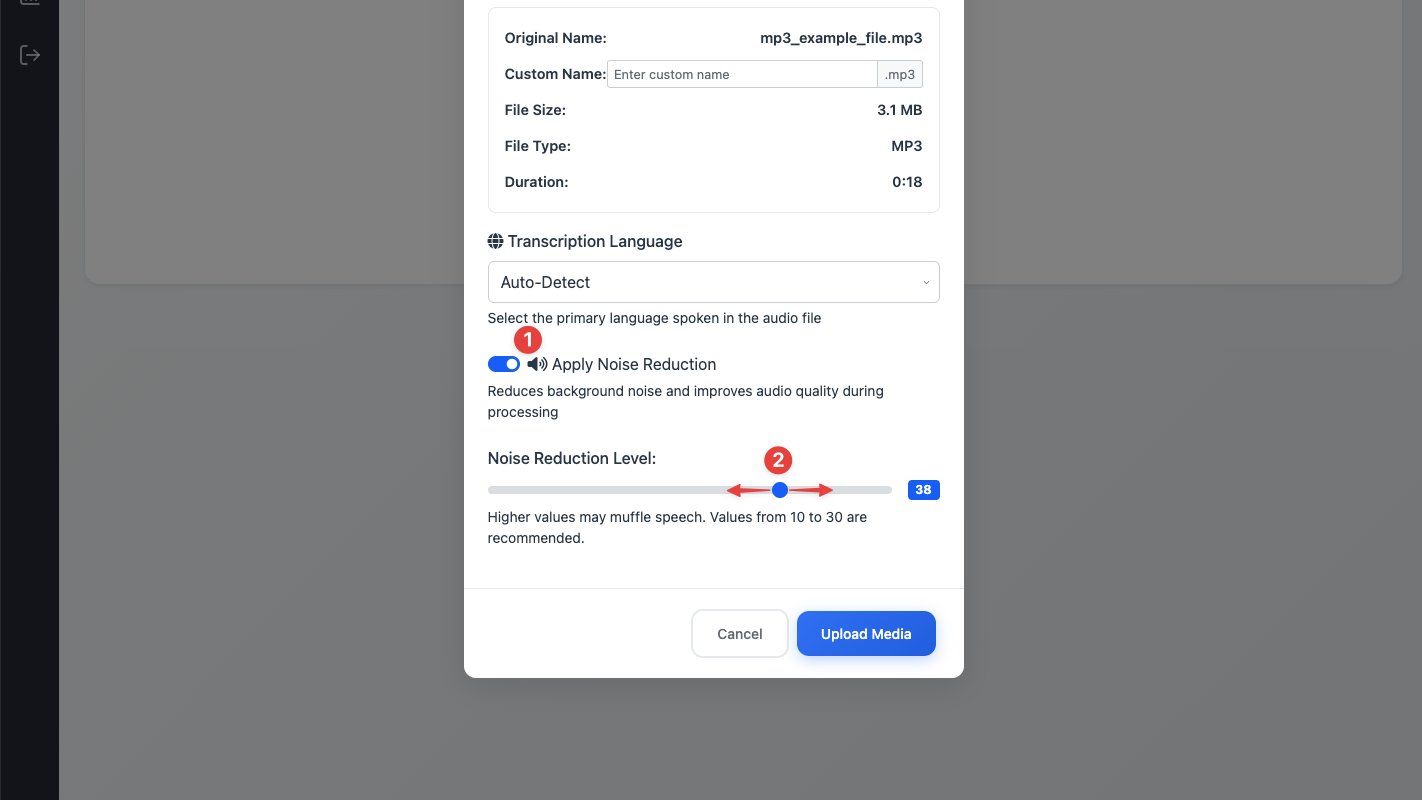
7. Configure Noise Reduction (Optional): If prompted, adjust the background noise reduction settings to optimize audio clarity for transcription. This step helps improve transcription accuracy, especially for audio recorded in less controlled environments.
8. Confirm Upload: Click Upload to begin transferring the file to the VRBTM platform. The upload time will depend on your internet connection speed and the file size.
9. Initiate Transcription: Once the file is successfully uploaded, locate the Transcribe button associated with the newly uploaded file within your project and click it. The system will begin processing the audio into text.
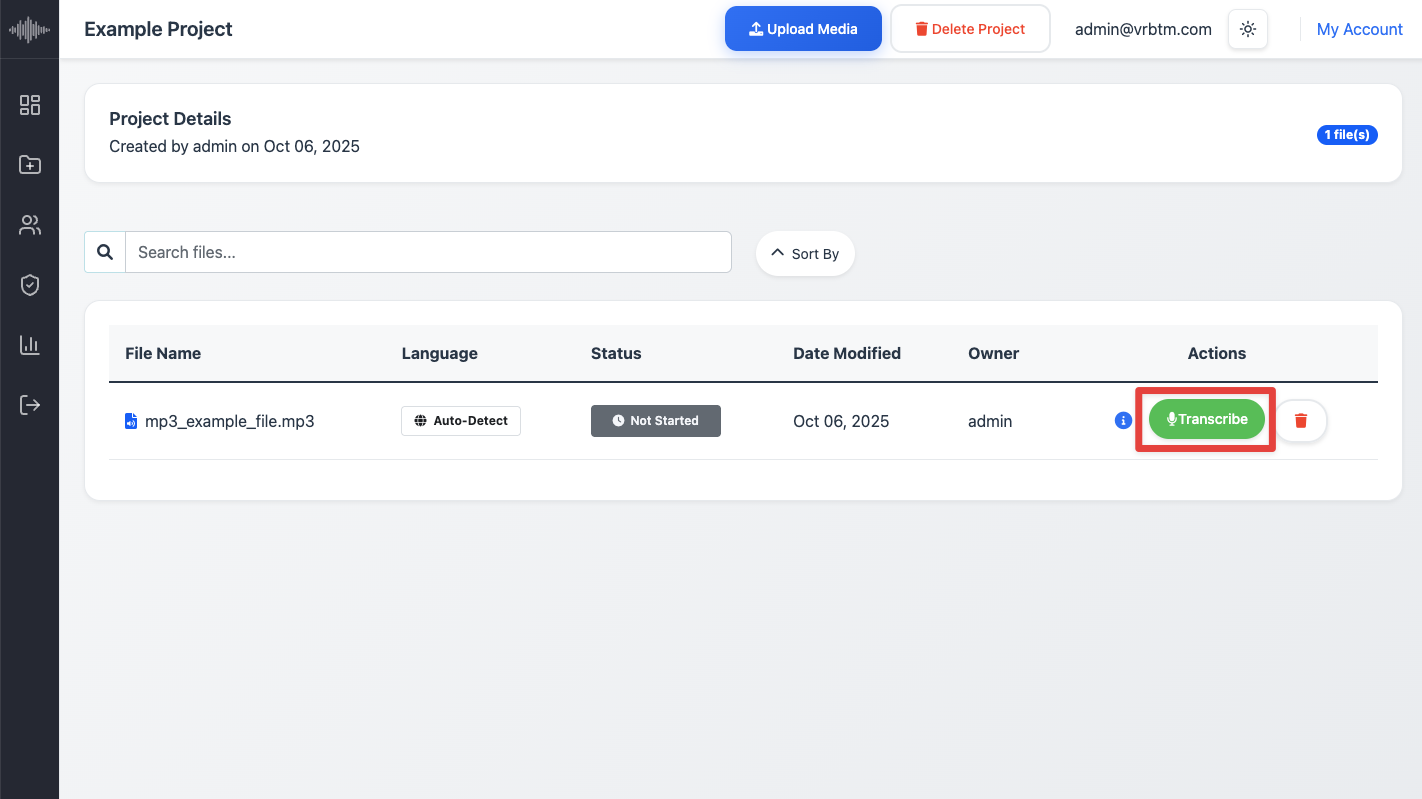
Monitor Progress: You may continue using other areas of the platform while the transcription is in progress. The status of the file will update from Uploading or Processing to Transcribed once complete. For larger files, this process should typically take under 10 minutes.
How to Edit and Redact a Transcription
After transcription, you’ll use the Transcription Editor to refine text and redact sensitive information. This process ensures the accuracy and compliance of the final disclosure pack.
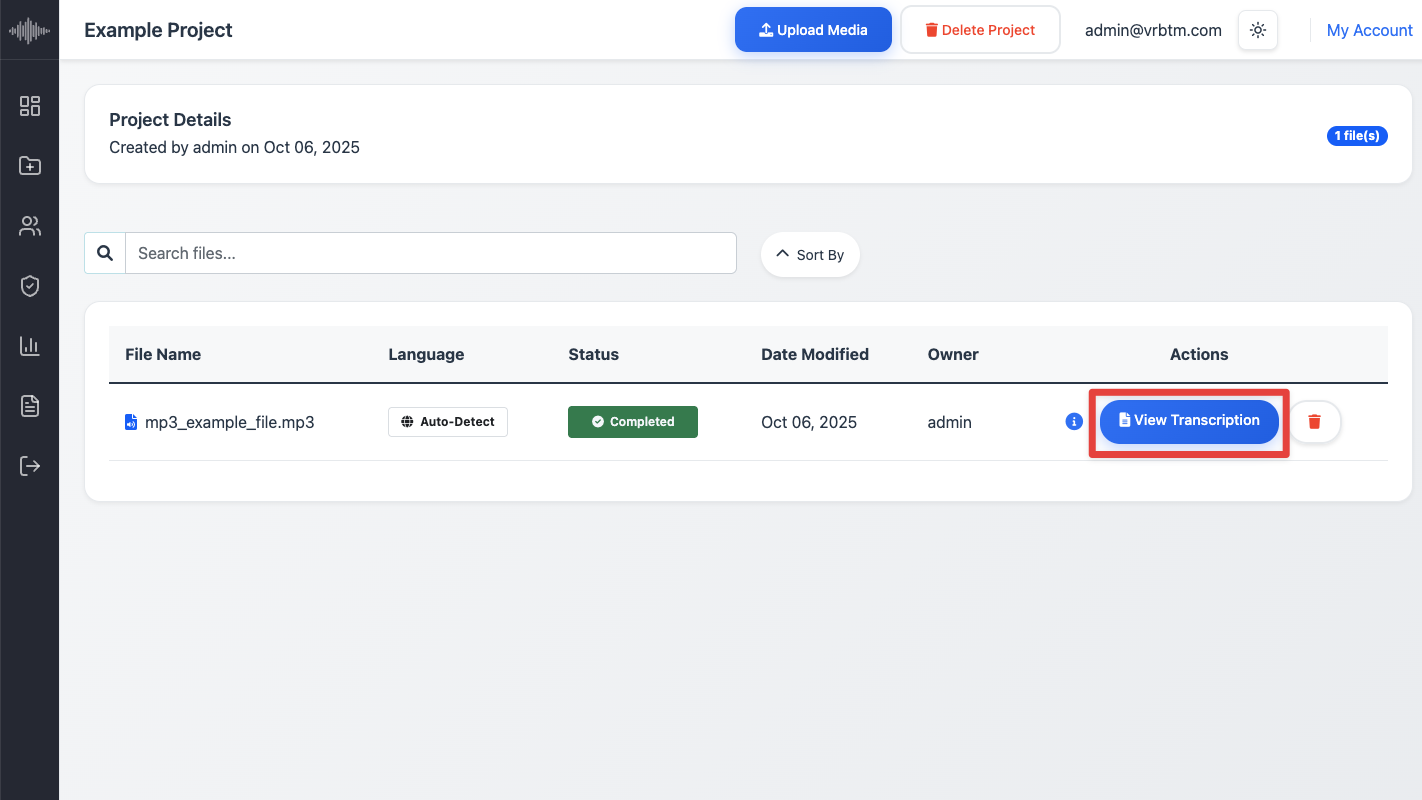
1. Access the Editor: Once transcription is complete, click on the file within your project to open it in the VRBTM Transcription Editor.
2. Review and Edit Text: The editor will display the transcribed text synchronized with the audio waveform. Play the audio and simultaneously review the text. Make any necessary corrections to ensure verbatim accuracy, proper grammar, and correct punctuation. Use the playback controls (play, pause, rewind, fast-forward) and the audio waveform scrubber to navigate precisely through the audio.
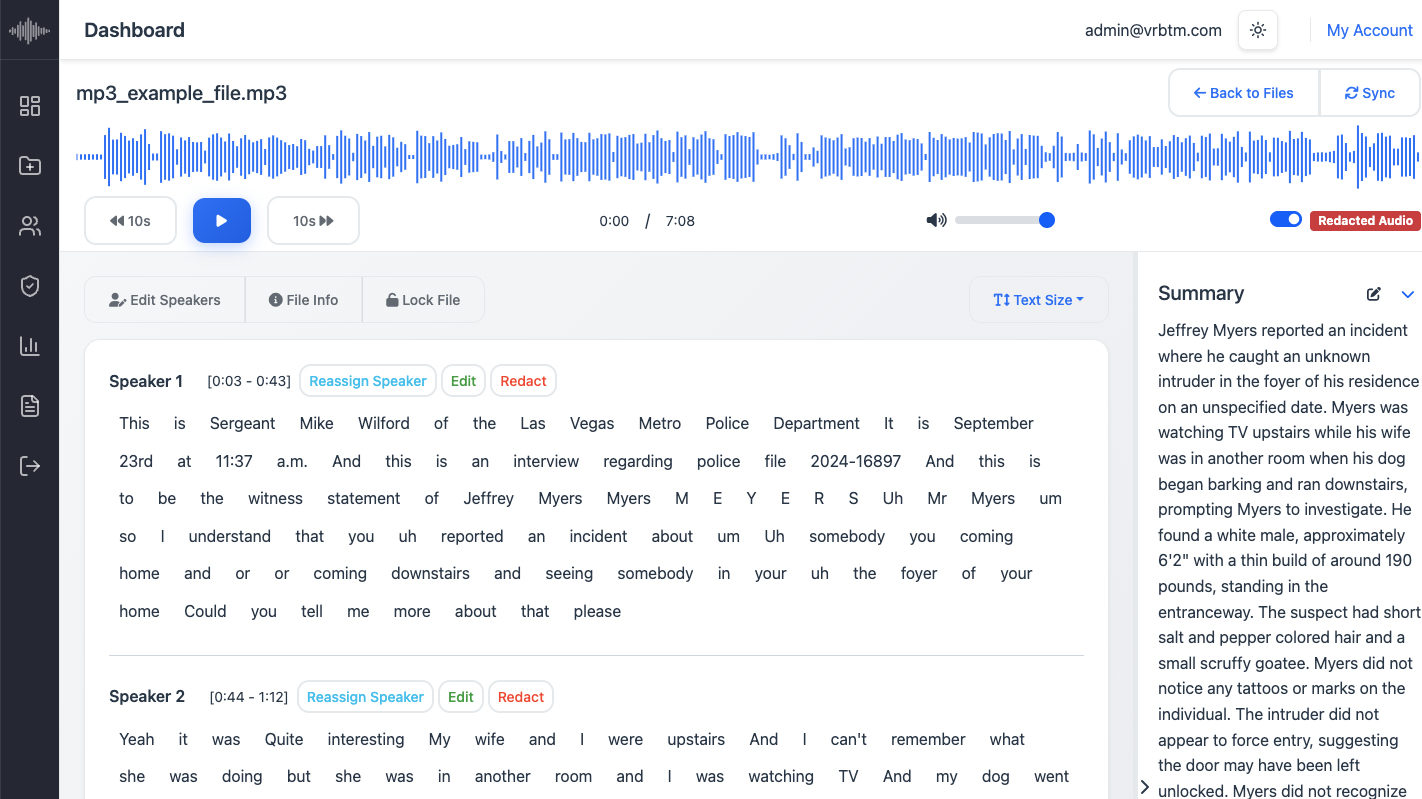
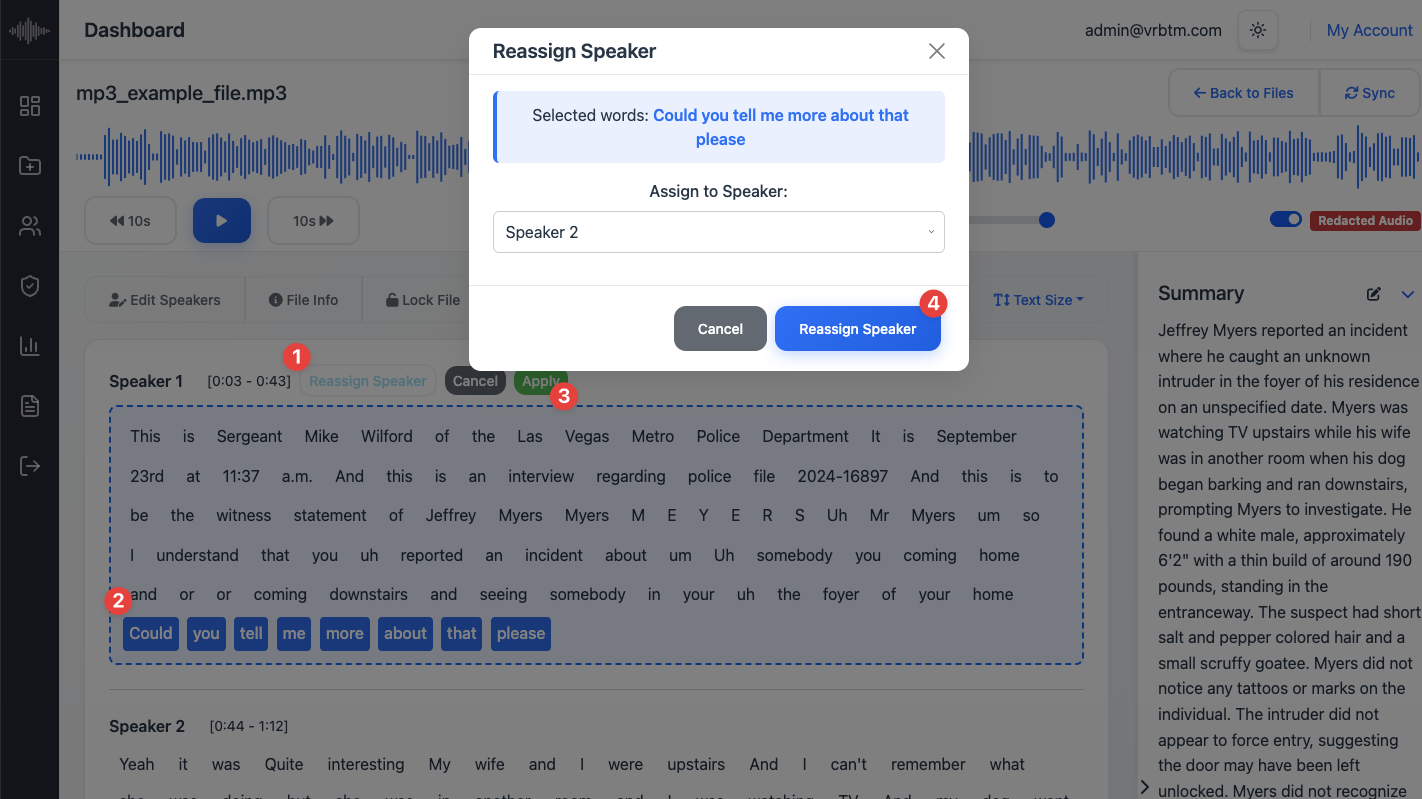
3. Reassign Speakers (If Needed): If the system incorrectly identified or separated speakers, select the relevant text segment and use the speaker reassignment tool to attribute the dialogue to the correct individual.
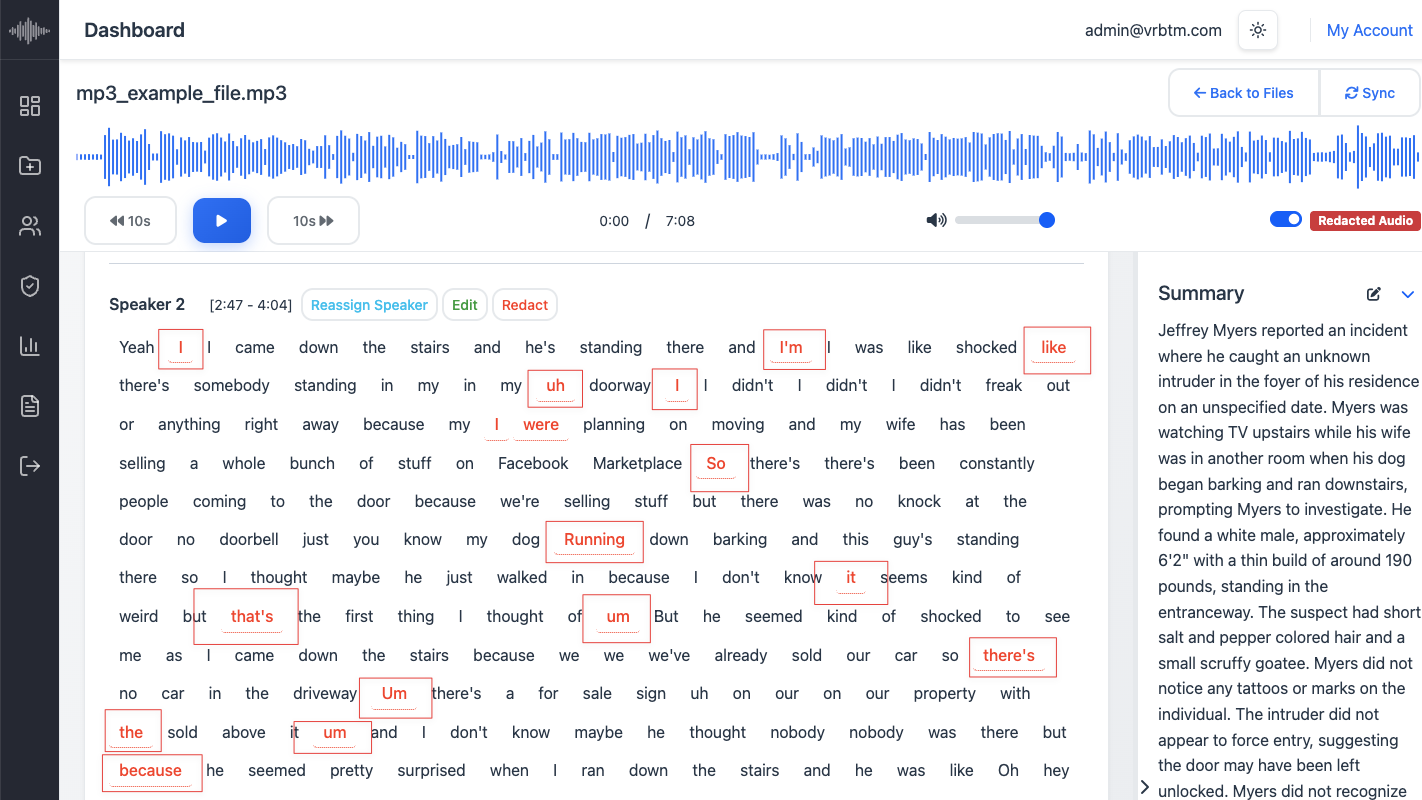
4. Address Confidence Ratings: Pay attention to any words or phrases highlighted due to low confidence ratings. These areas may require closer manual review and correction to ensure accuracy.
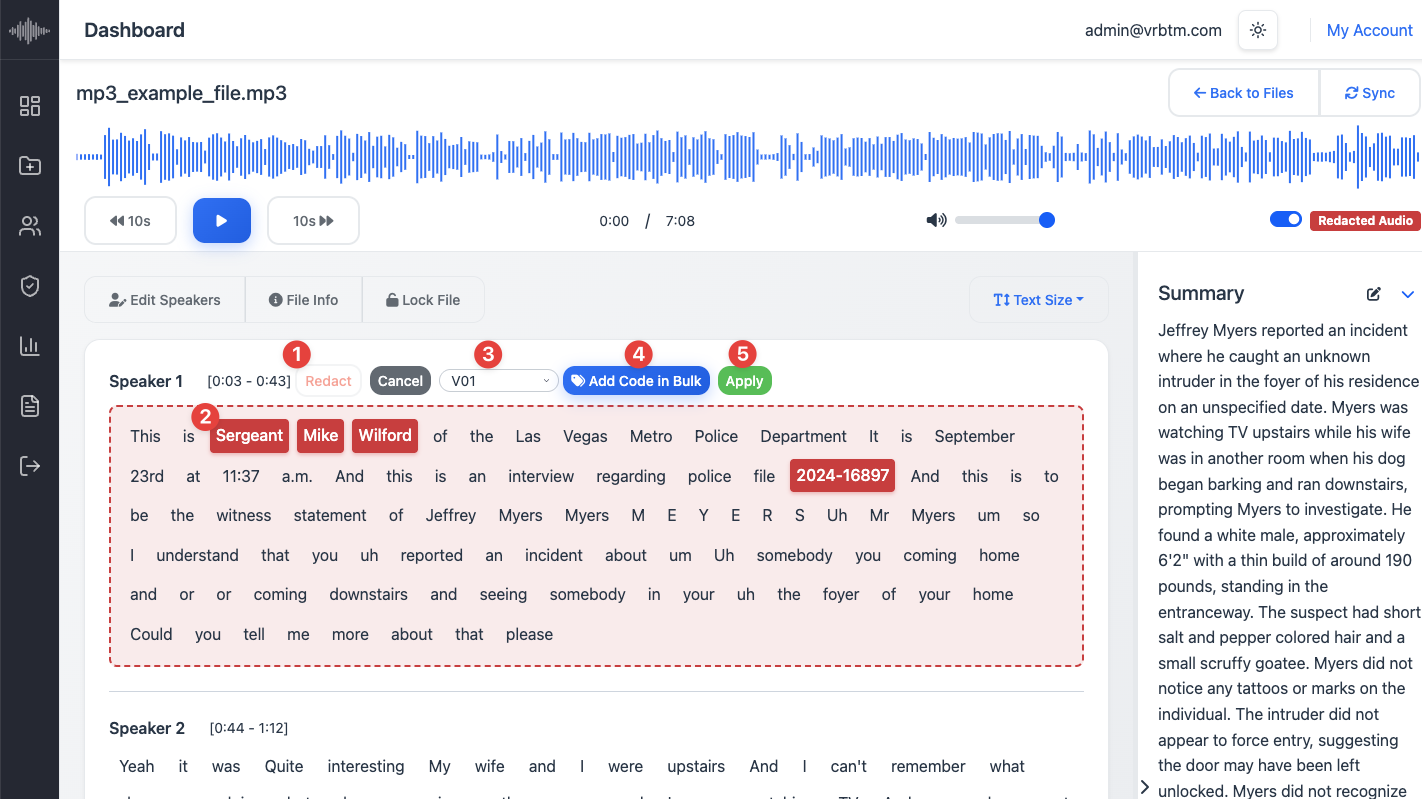
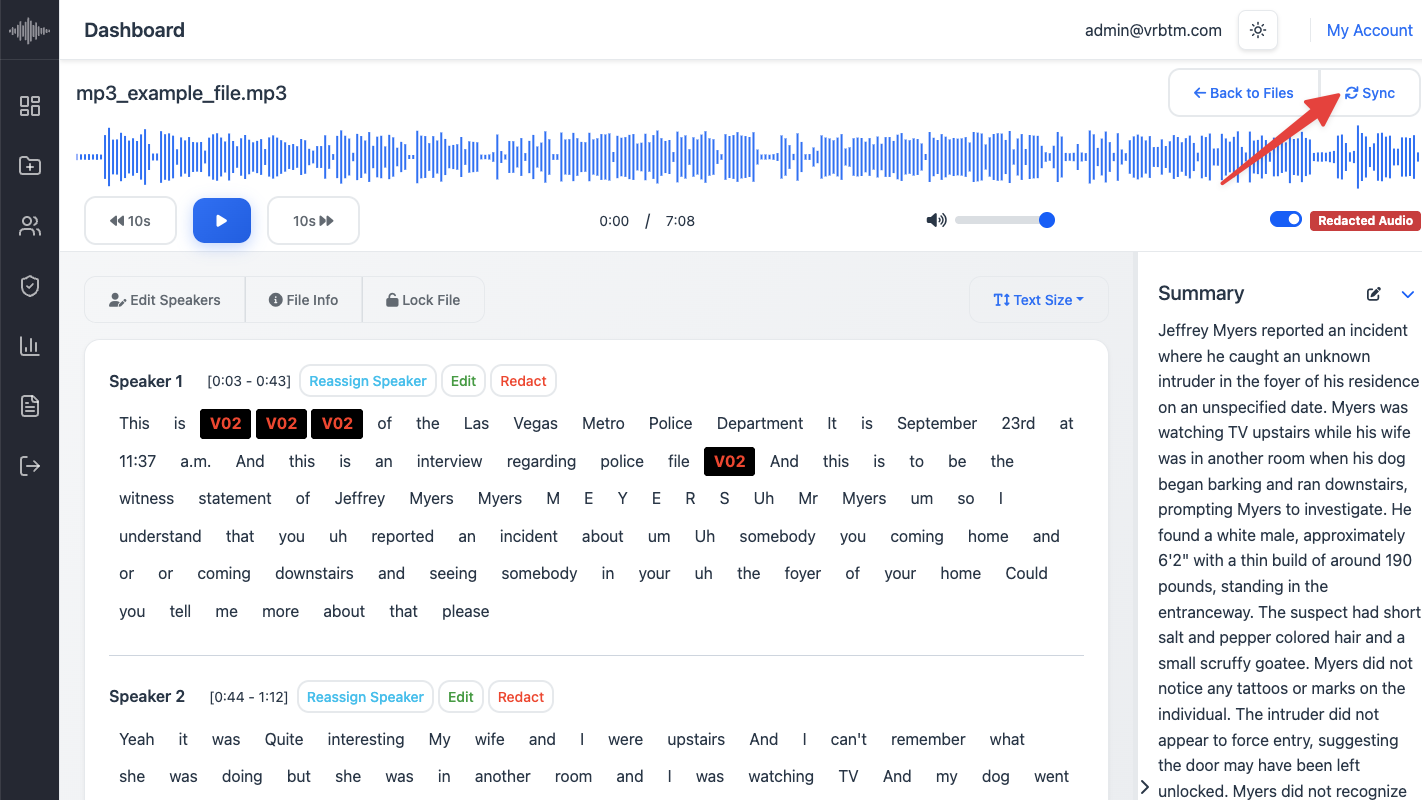
5. Redact Sensitive Information: Click the Redact button to enter redaction mode. Then, select the specific words, phrases, or sentences you wish to redact. Next, choose the appropriate redaction code from the list, click Add Code in Bulk, and finally select Apply to confirm the redaction.
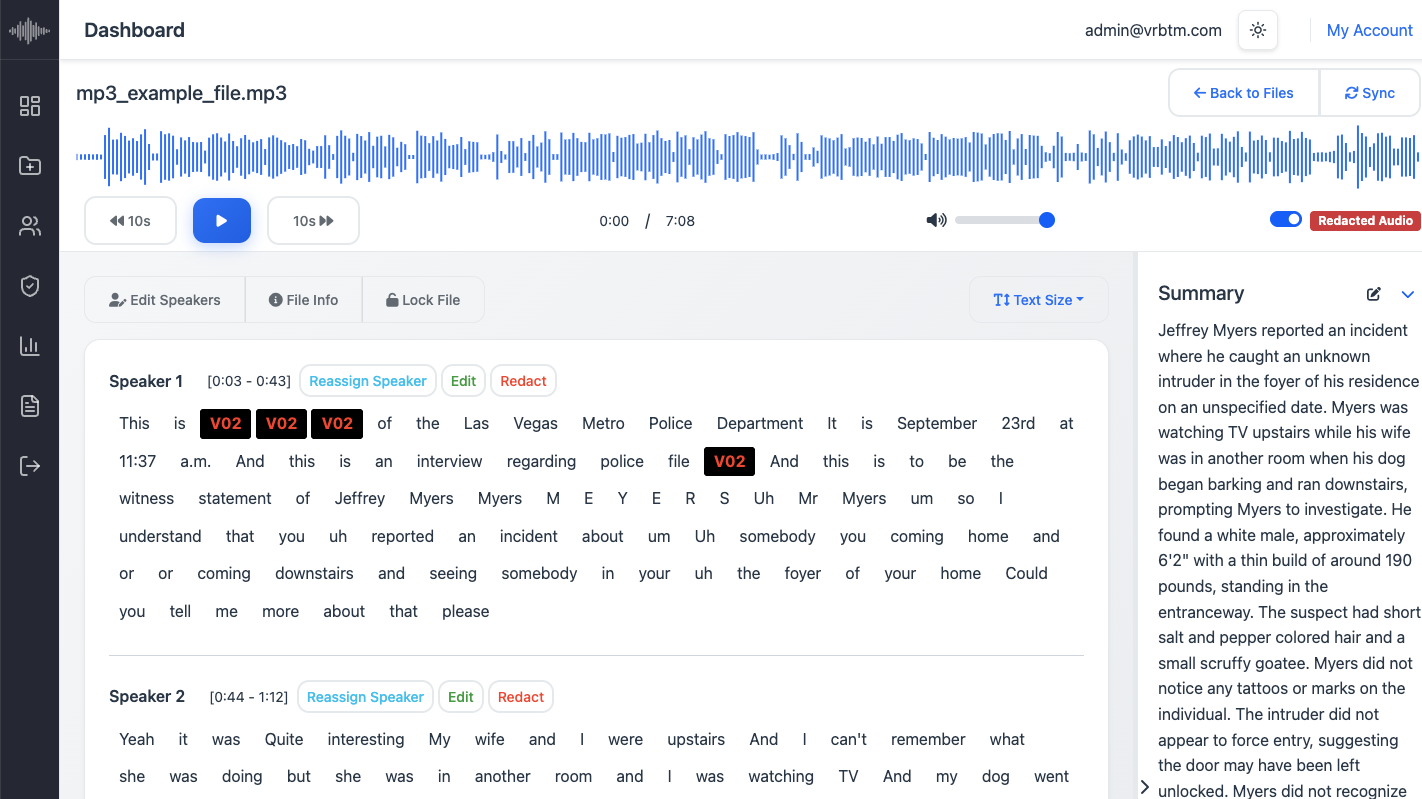
The selected text will be obscured.
6. Sync Audio Redaction: After redacting text, locate and click the Sync button. This critical step ensures that the corresponding audio segment is also redacted, maintaining consistency between the text and audio components of the disclosure pack. This step prevents any inadvertent disclosure through the audio.
How to Export a Disclosure Pack
Exporting the disclosure pack is the final step in the VRBTM workflow, compiling all processed information into a secure and auditable package.
1. Finalize Edits and Redactions: Ensure all necessary text edits, speaker reassignments, and redactions (both text and audio) have been completed.
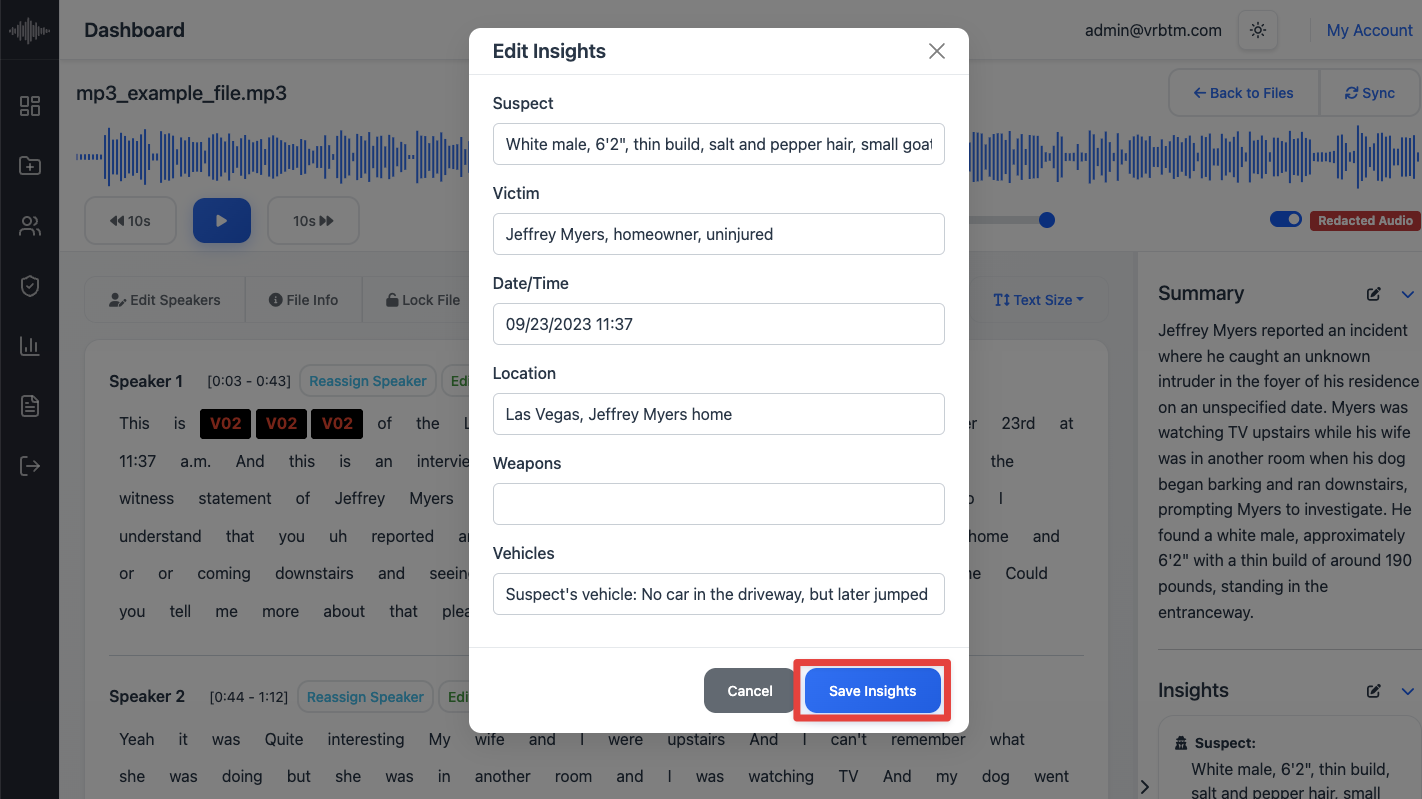
2. Edit Summary and Insights: Review and refine the auto-generated summary and insights to ensure they accurately reflect the key takeaways and meet your disclosure requirements.
To make changes, simply click the Edit icon next to Summary or Insights.
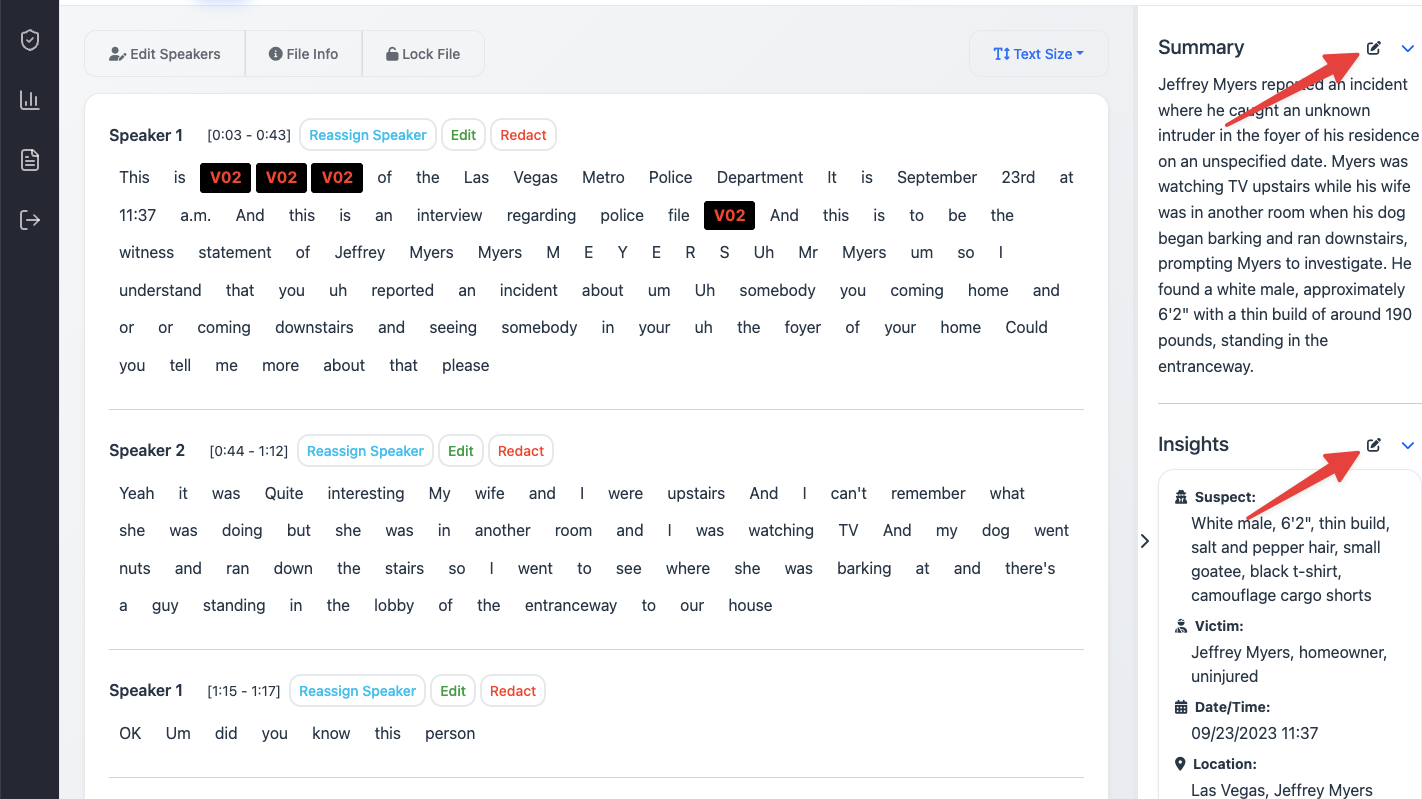
Once your edits are complete, click Save Summary or Save Insights to confirm and store your updates.
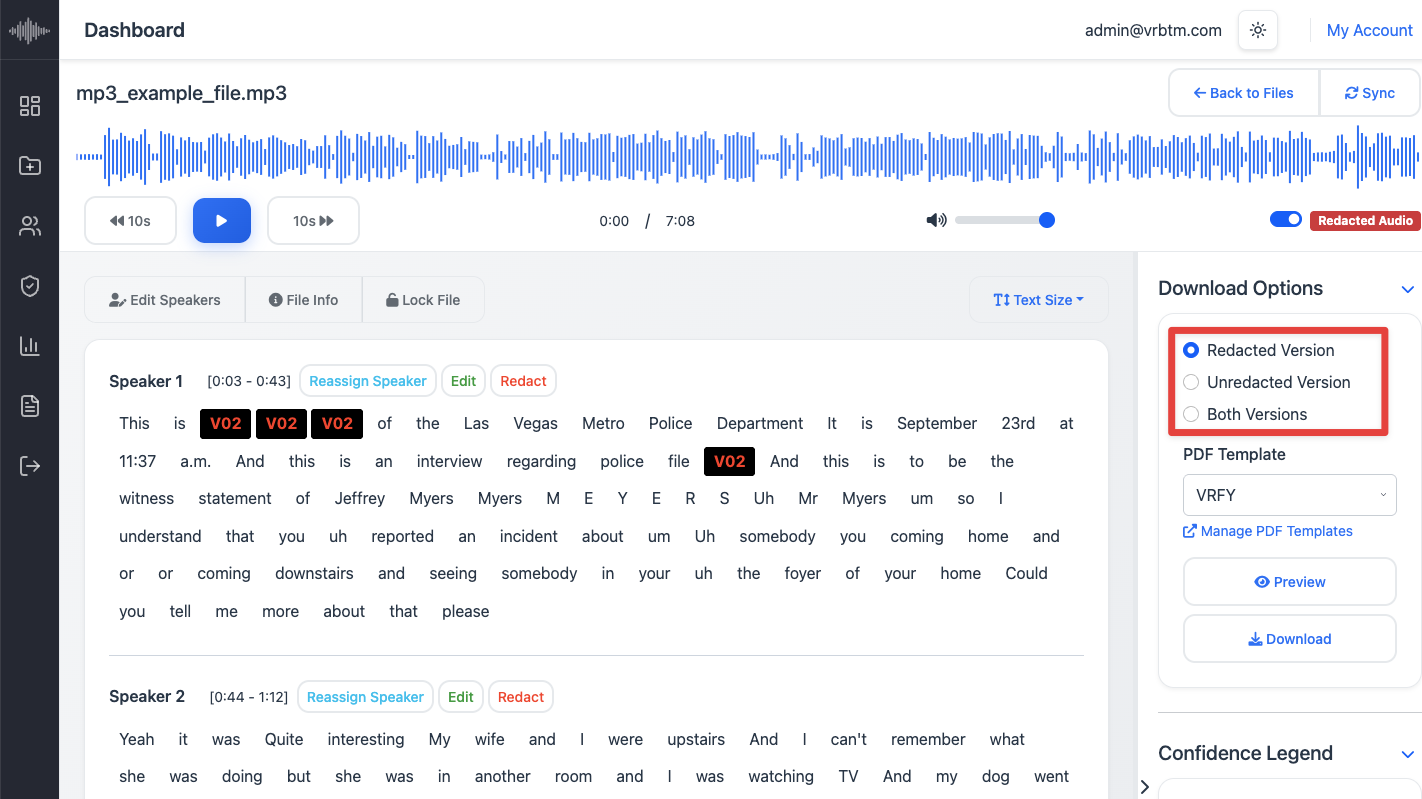
3. Select Output Template: Select your preferred disclosure pack template: either the standard VRBTM option or a previously created custom template (which may include your organization’s logo and formatting).
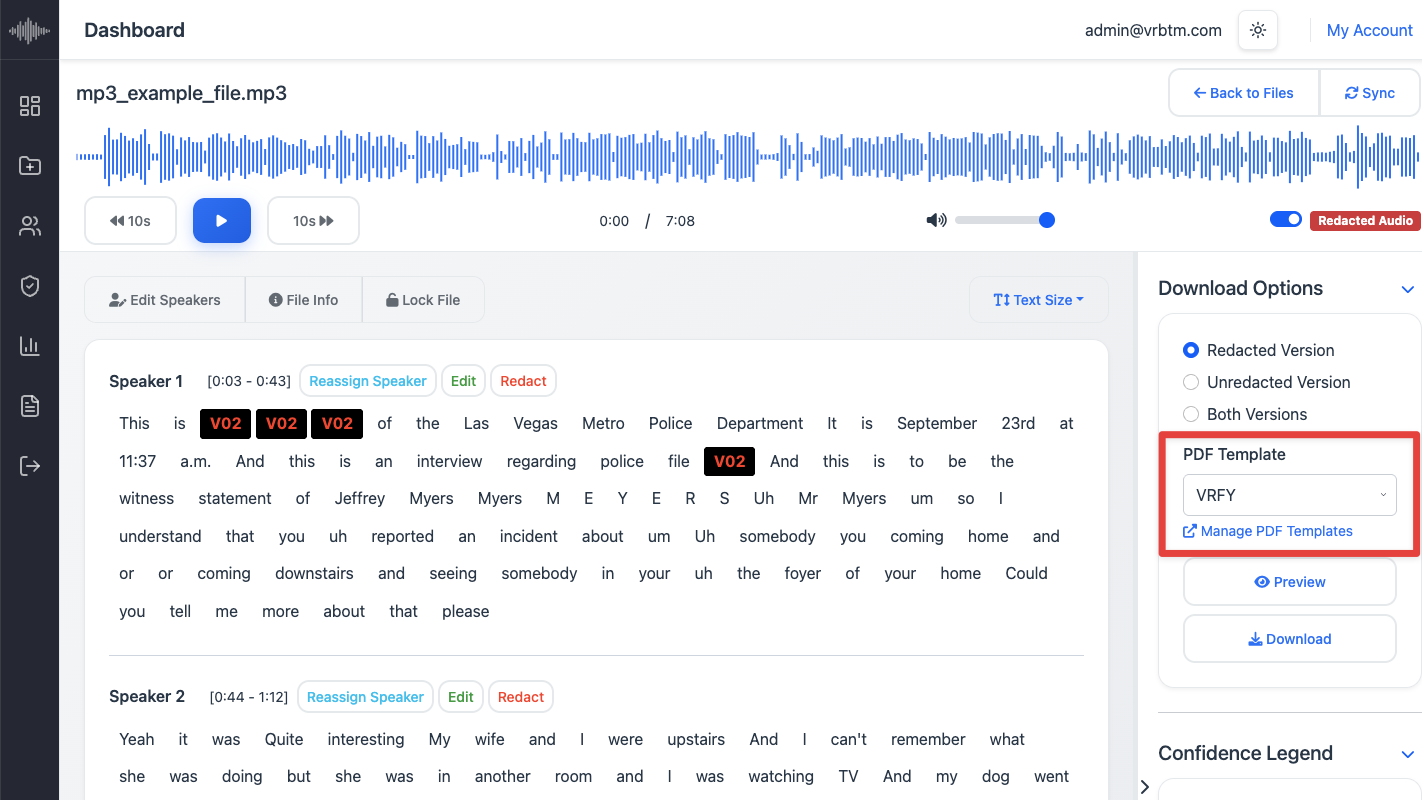
4. Choose Download Options: Specify which versions of the transcription you wish to include in the disclosure pack: redacted, non-redacted, or both.
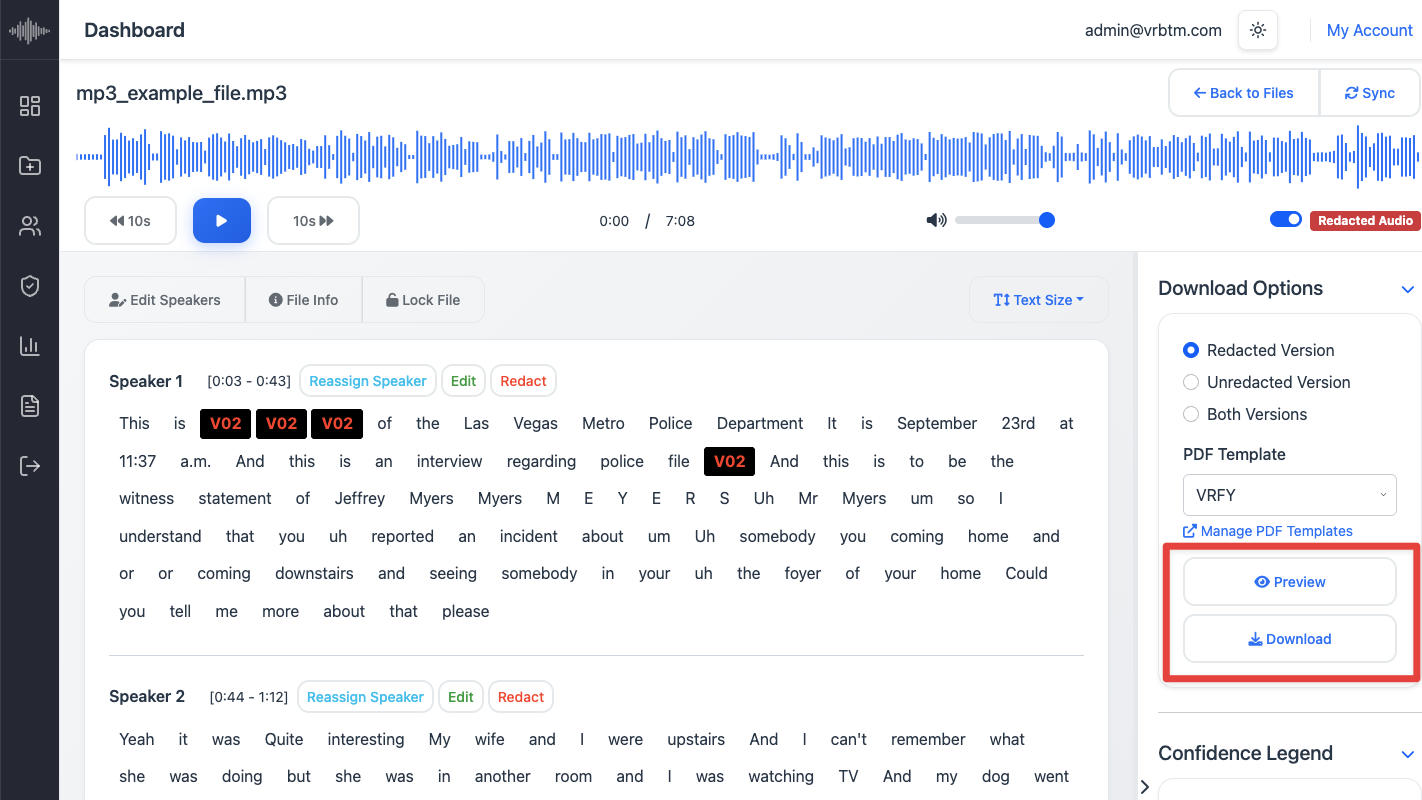
5. Initiate Download: Click the Download button. The system will compile all components (PDFs of text, redacted and unredacted MP3 audio, summary, insights, and audit log) into a single ZIP file.
If you’d like to review the document before exporting, click Preview to open a PDF pop-up preview of the disclosure pack.
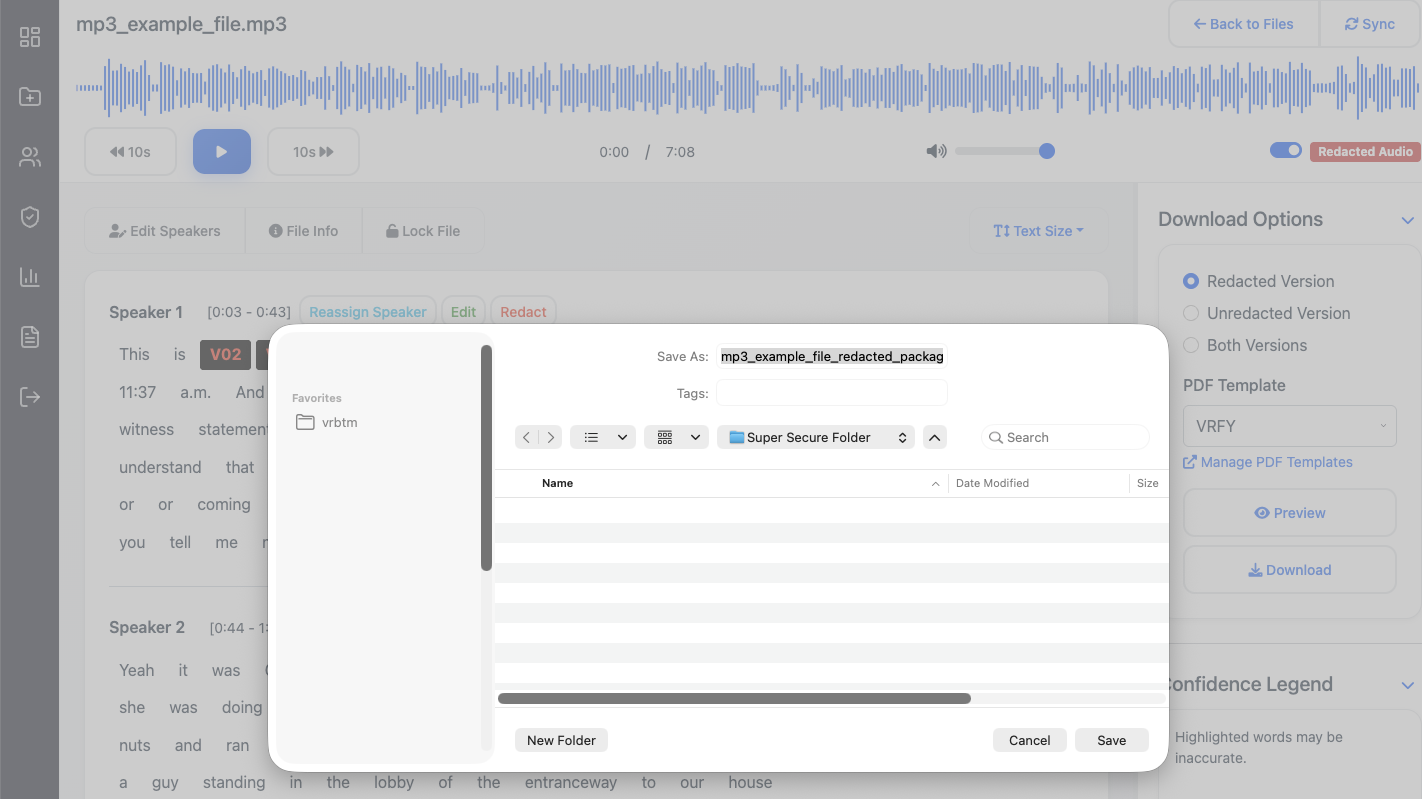
6. Save ZIP File: Your browser will prompt you to save the ZIP file to your local device. Choose a secure location for storage.
How to Translate a Transcription
The Translation feature in VRBTM allows users to automatically translate transcribed content and its corresponding audio into another supported language. This functionality is especially useful for multilingual disclosures, cross-border reporting, or compliance requirements in international environments.
* Before initiating a translation, it is important to ensure that the transcription has been fully reviewed and corrected for accuracy.
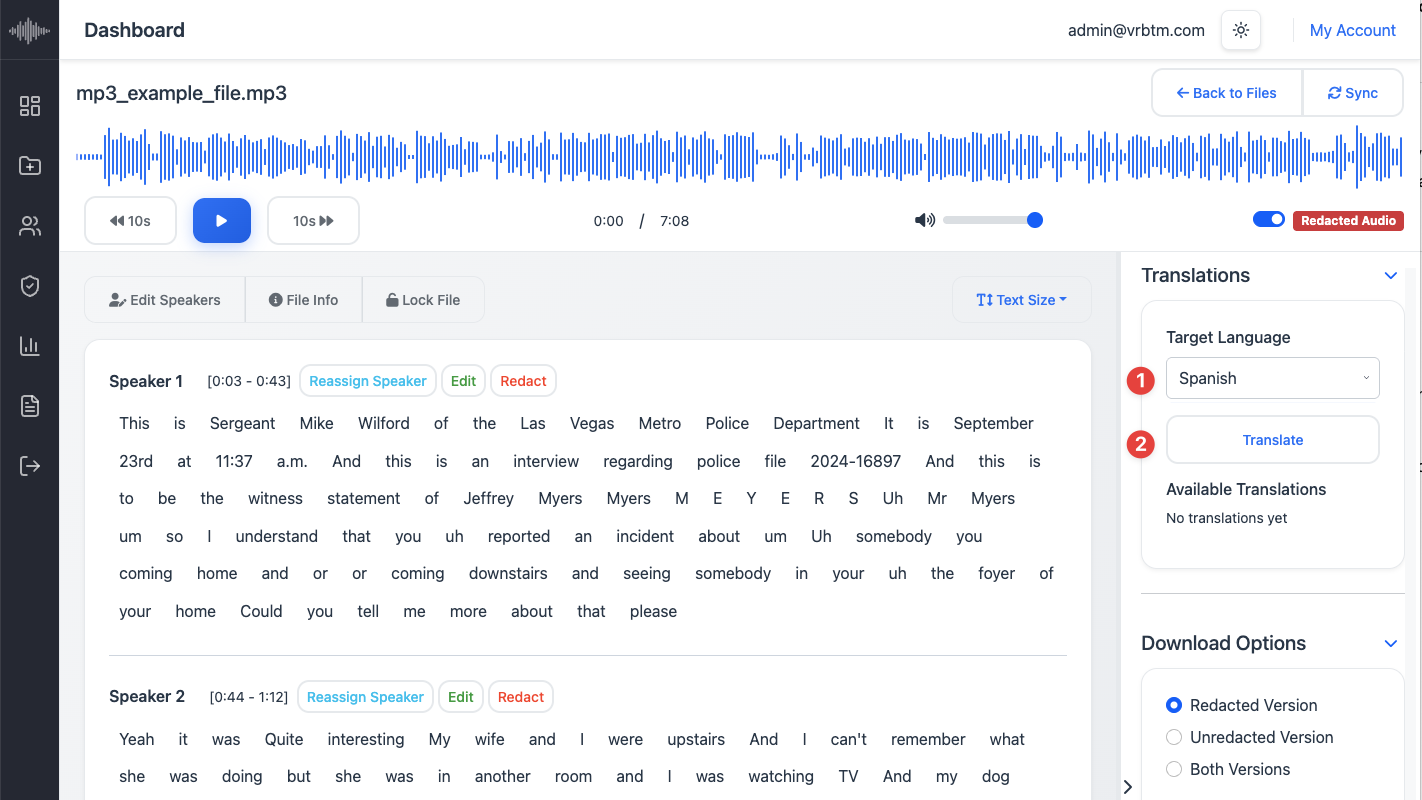
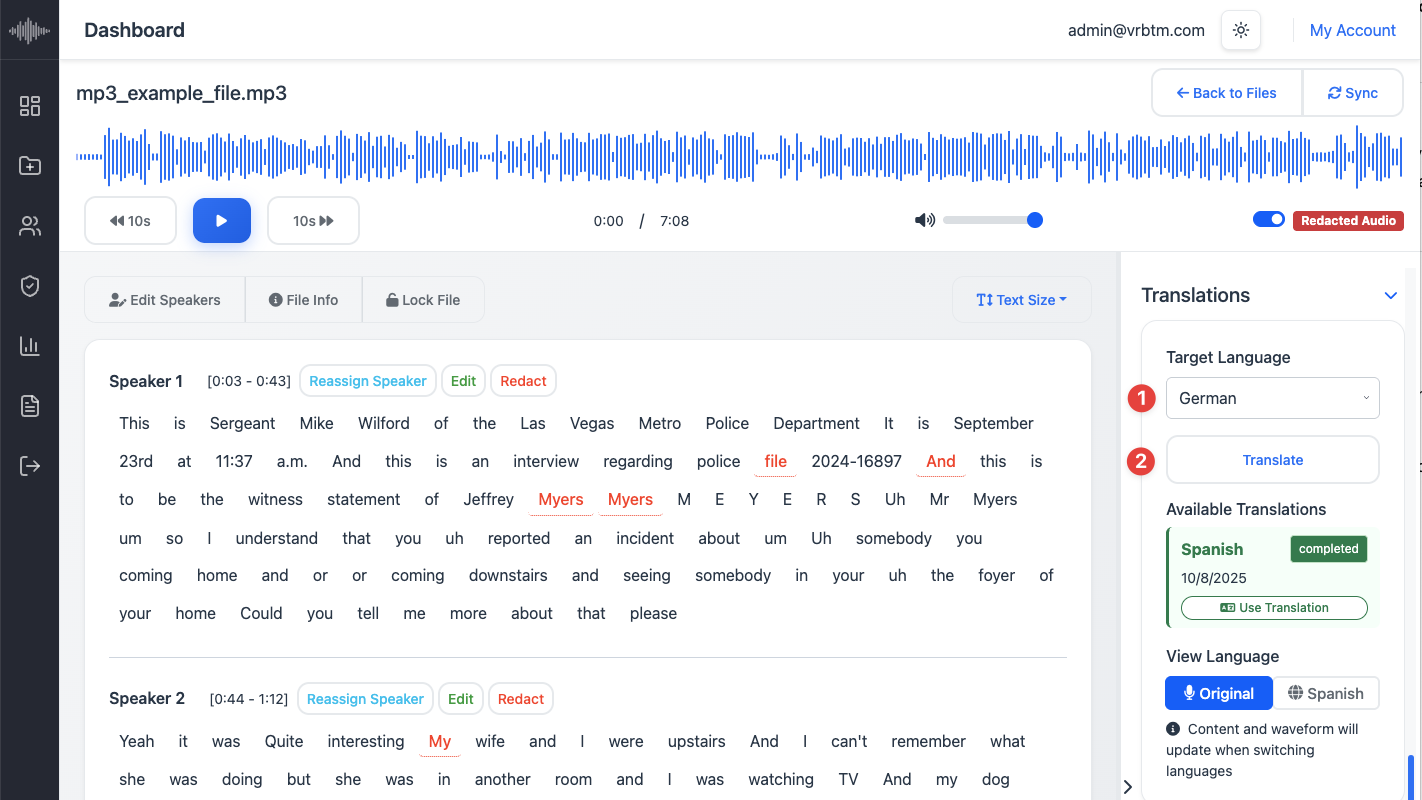
1. Access the Translation Section: In the right-hand navigation panel, scroll down to locate the Translations section.
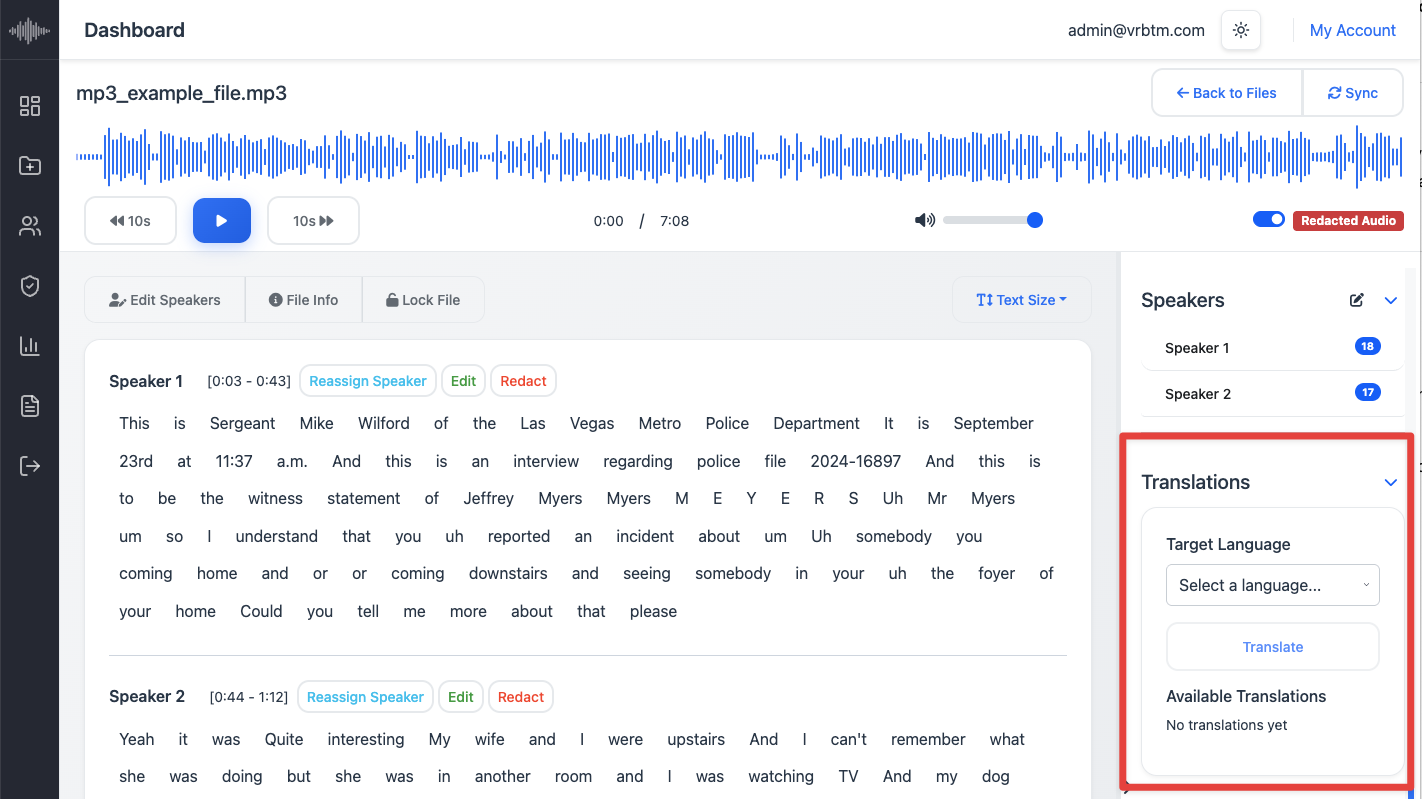
2. Select Target Language: From the language drop-down menu, choose the language you want to translate the transcription into. Then click Translate.
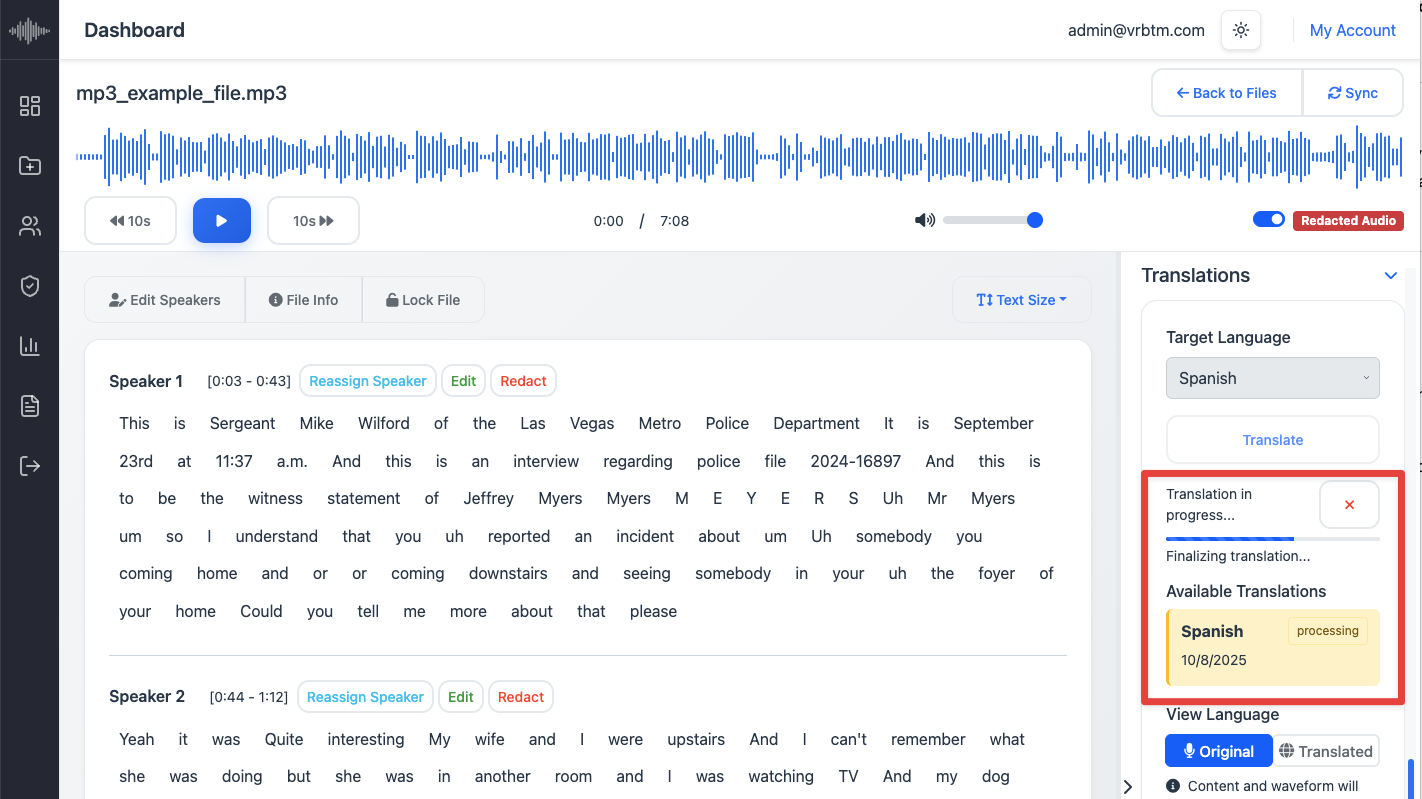
The system will generate both the translated text and the corresponding audio file in the selected language.
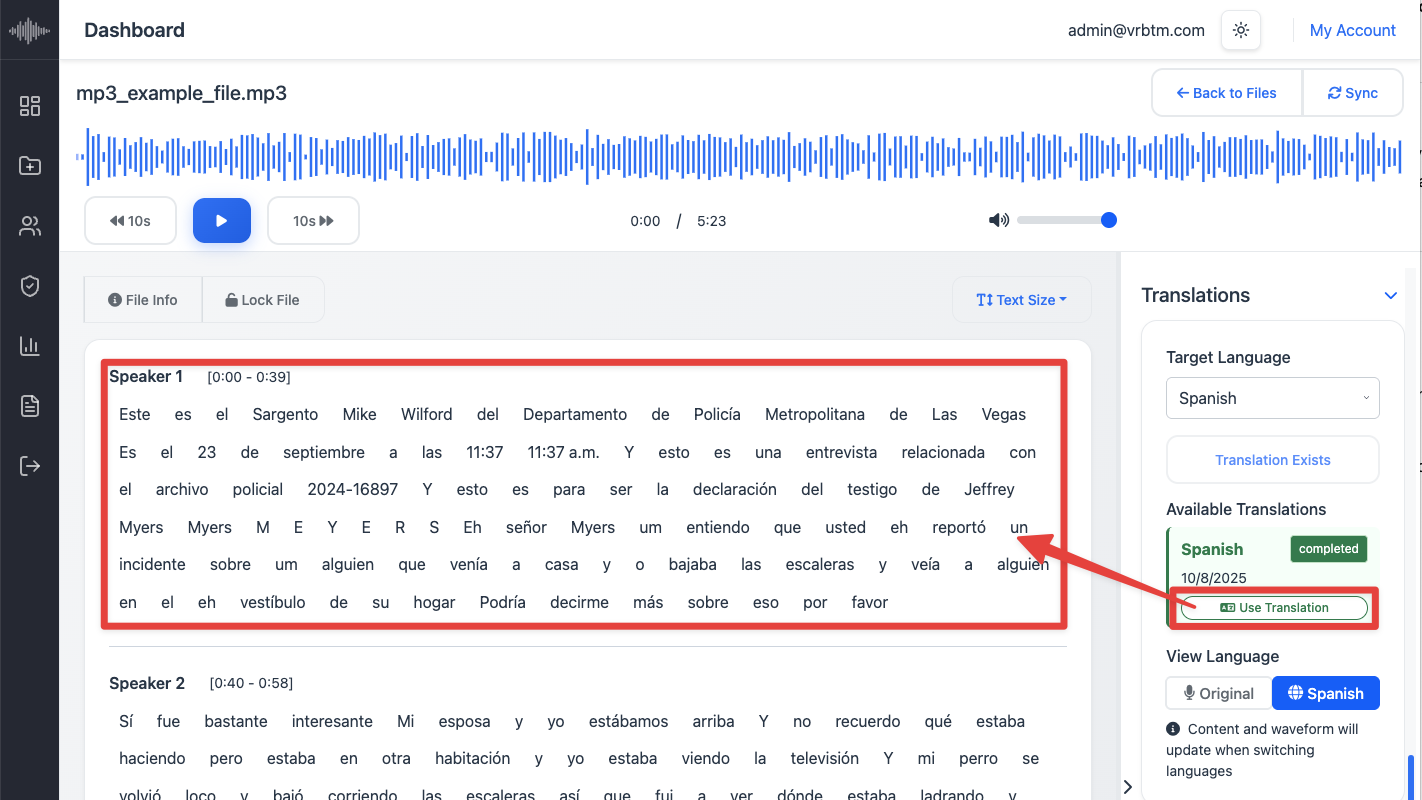
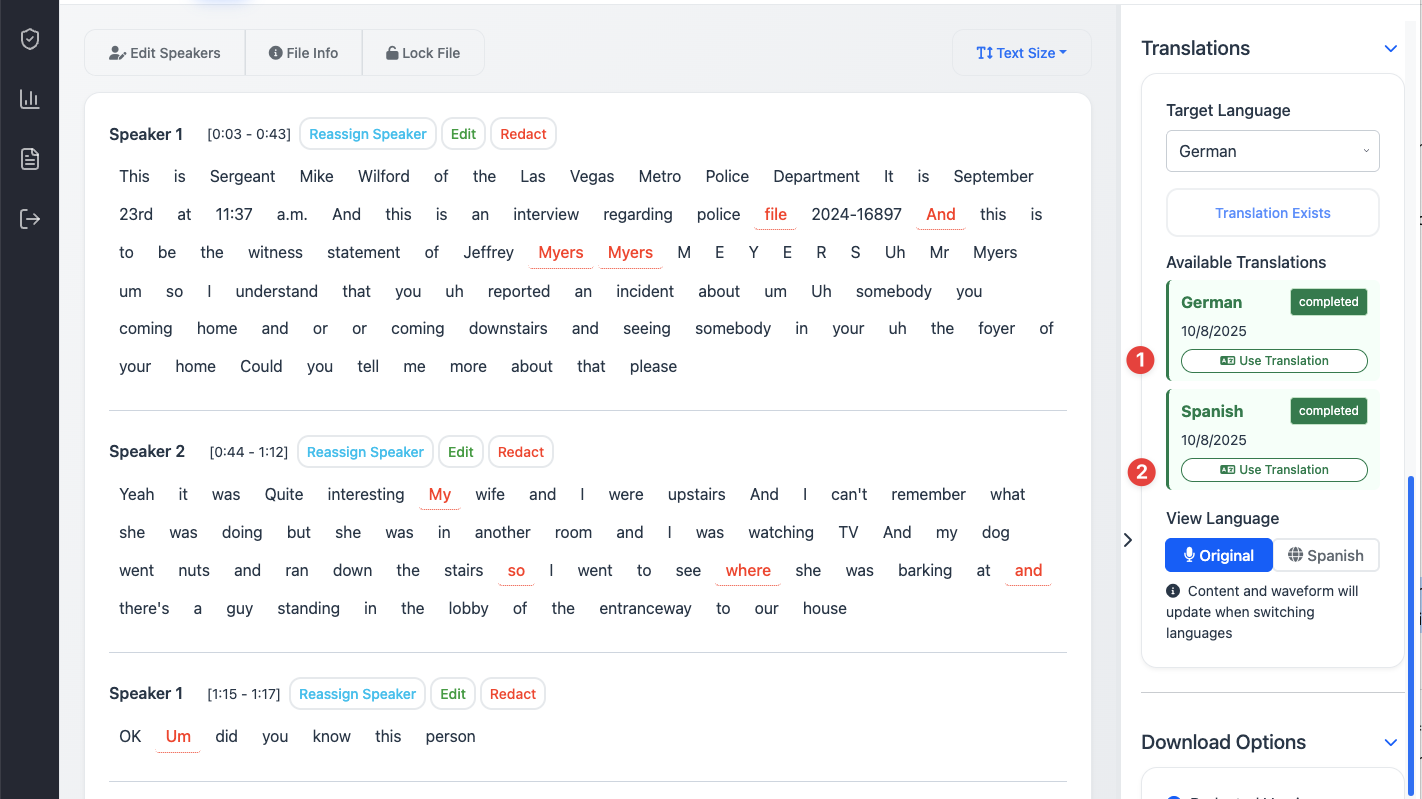
3. Apply the Translation: Click Use Translation to replace the current transcript view with the newly translated version. The text displayed in the Transcription Editor will now appear in the selected language.
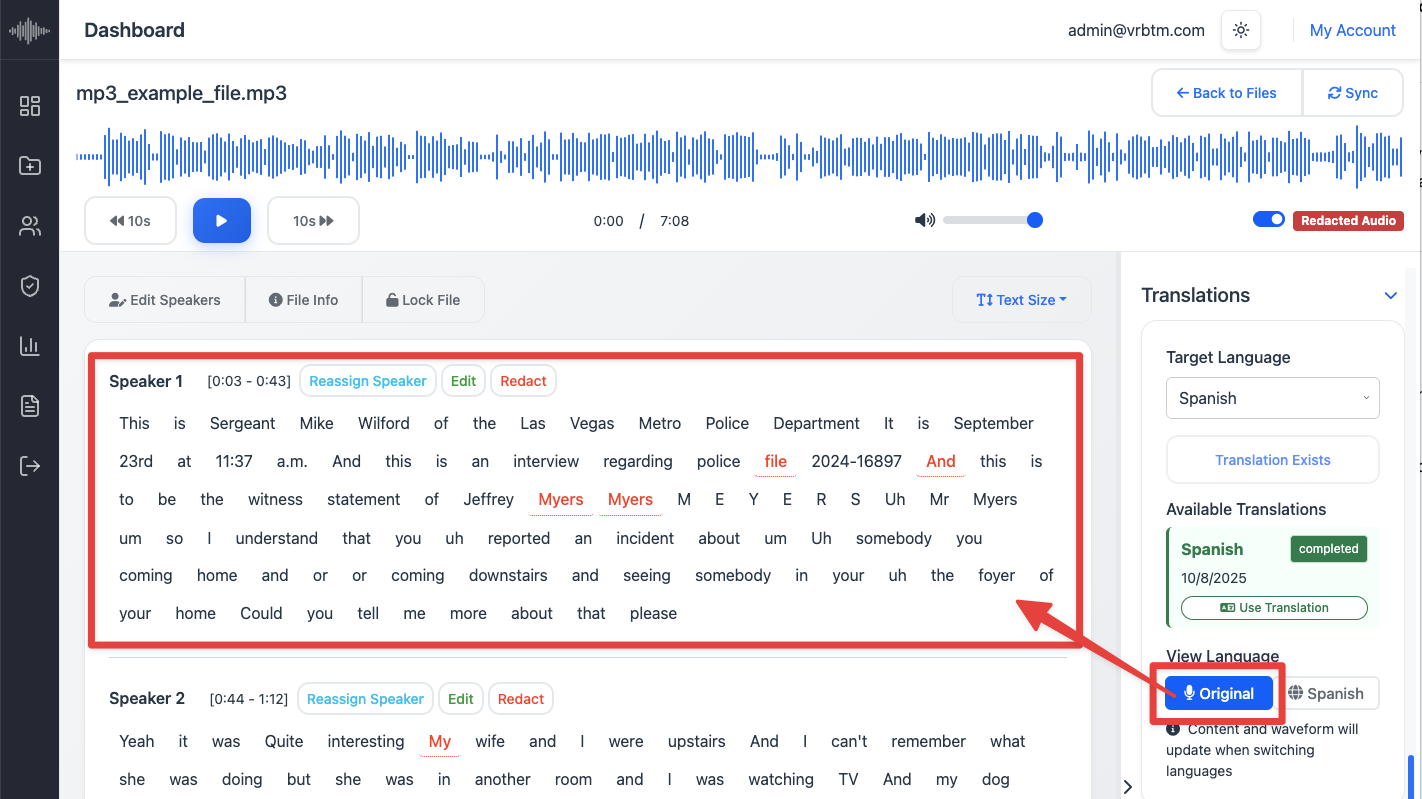
4. Return to Original Language: To revert to the original transcription language, click Original. The editor will immediately switch back to the original text and audio version.
5. Generate Additional Translations (Optional): If you wish to translate the transcript into another language, repeat the process from Step 2. Each translation will be saved and accessible under the Translations section of the project.
Once a new translation is initiated, the system will begin processing it automatically. When the translation is complete, it will appear in the Translations list, where you can choose among the available versions by clicking Use Translation to display the preferred language version in the editor.
How to Create a Custom Template
VRBTM lets you create custom output templates to ensure brand consistency and meet specific disclosure pack formatting requirements. This process is wizard-led for ease of use.
1. Access Settings: Navigate to the Settings section of the VRBTM platform.
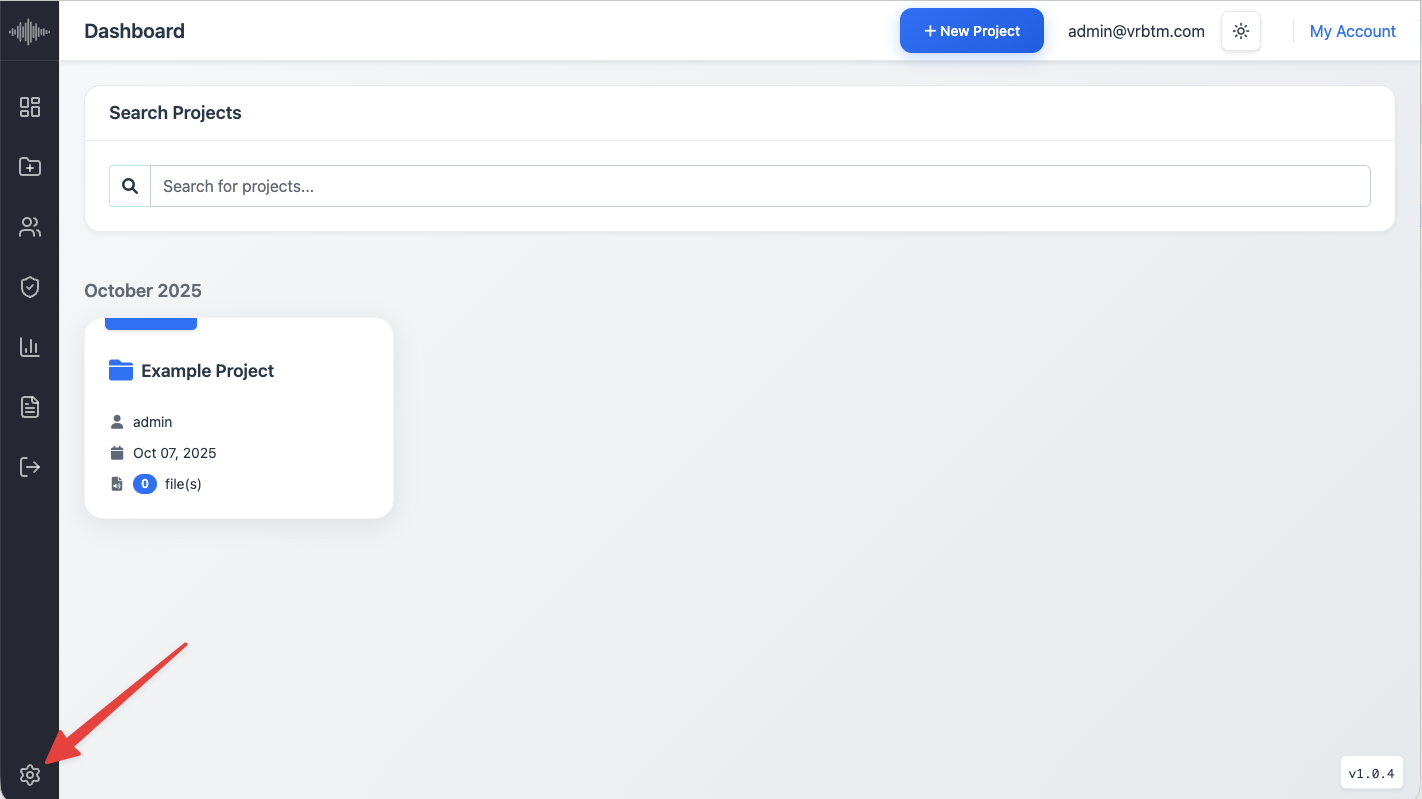
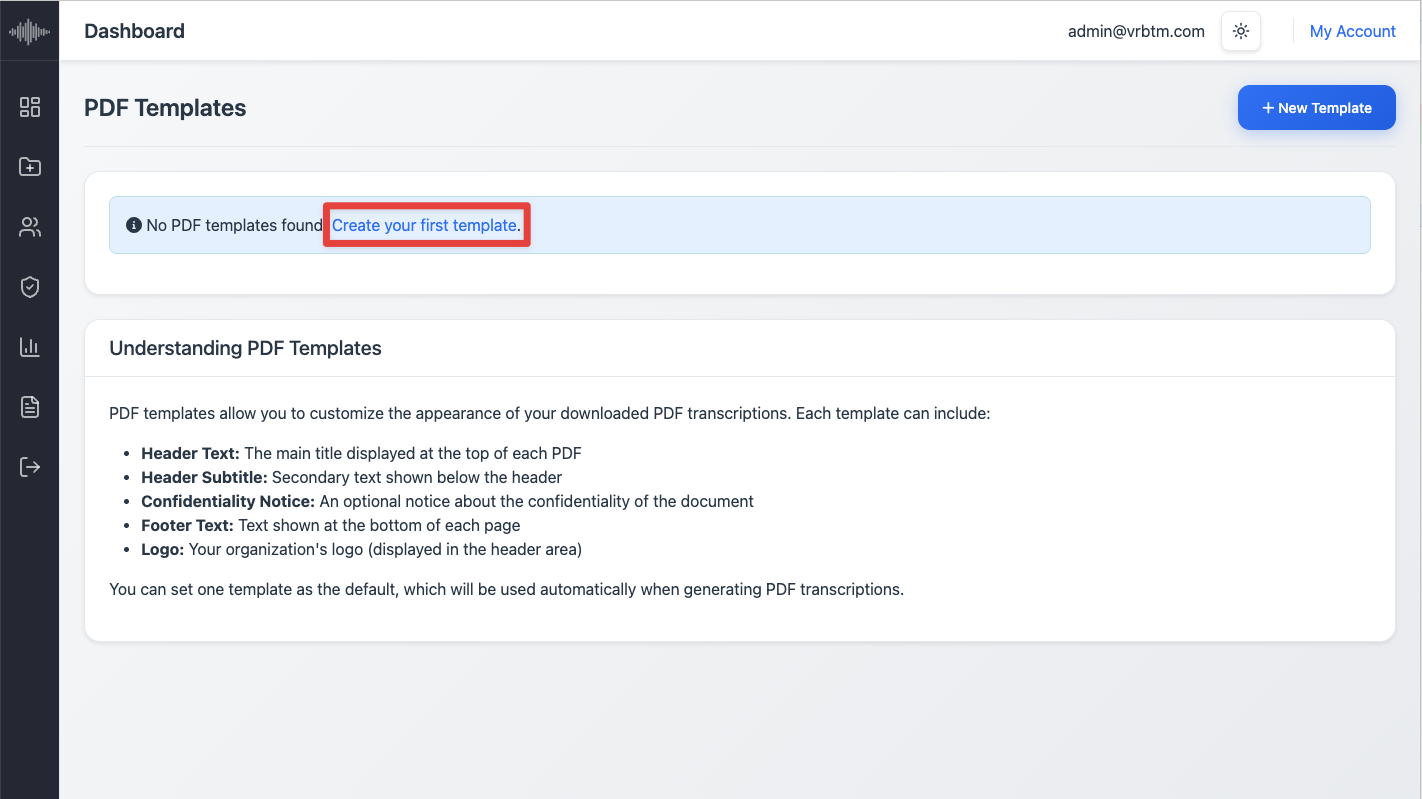
2. Locate Template Configuration: Within Quick Actions, click on PDF Templates.
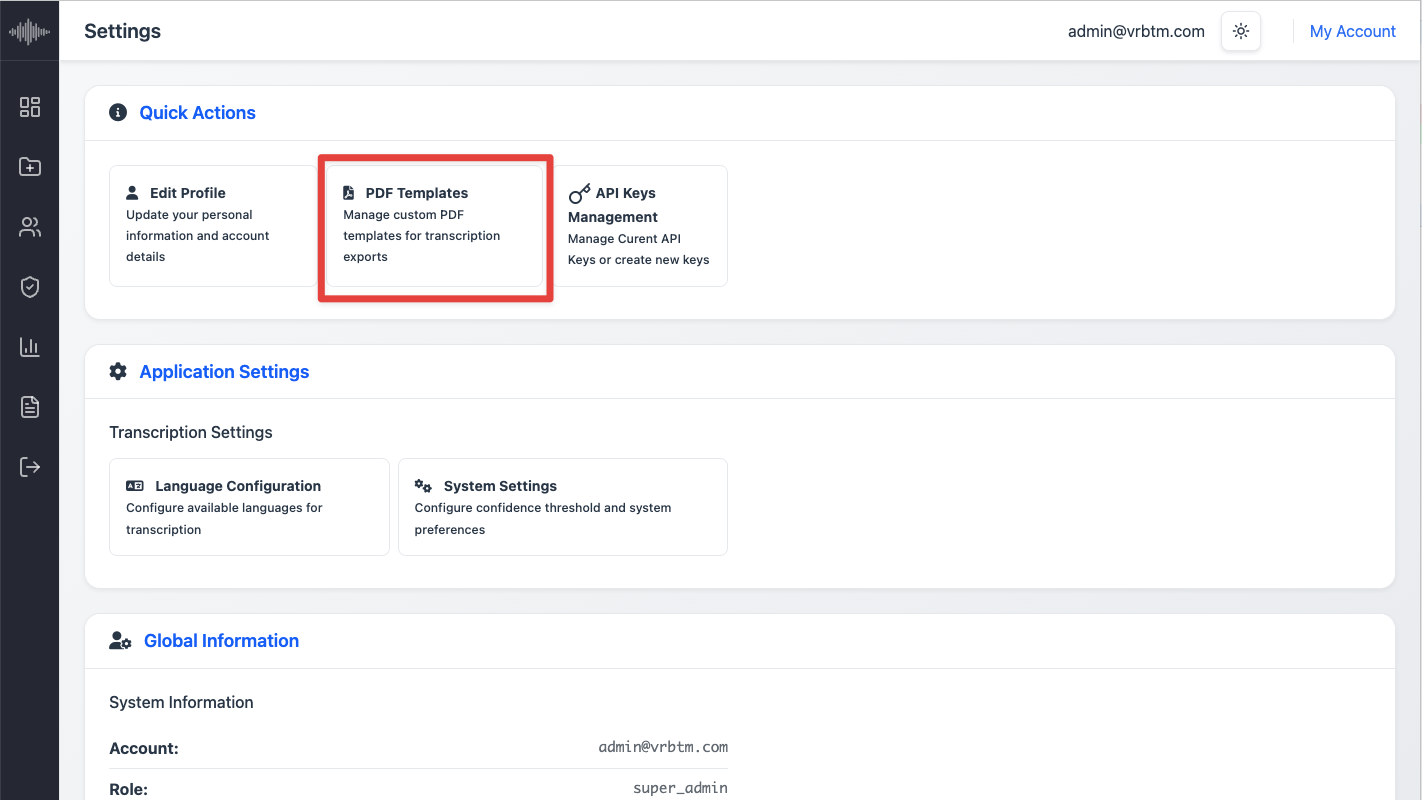
3. Start New Template Wizard: Select the option to create a new template to launch the wizard interface.
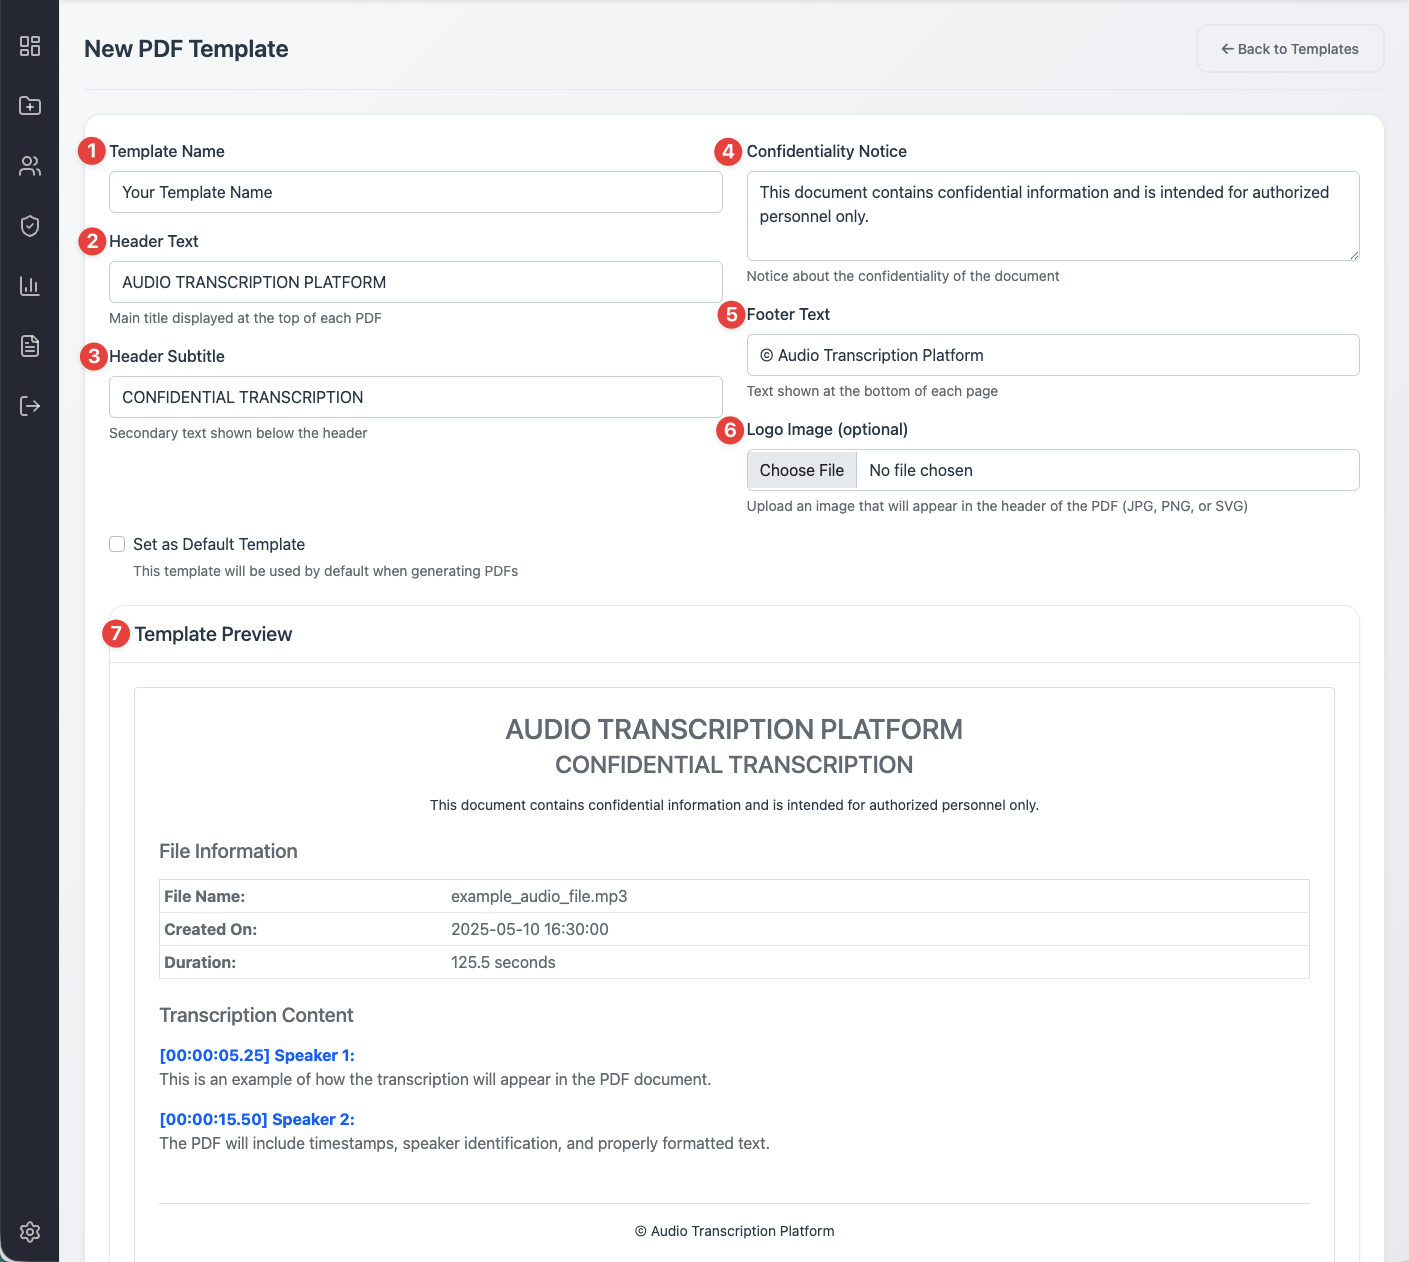
4. Follow Wizard Steps: The wizard will guide you through various configuration options. This may include:
- 1. Template Name: Provide a descriptive name for your custom template.
- 2. Header Text: The main title displayed at the top of each PDF.
- 3. Header Subtitle: Secondary text shown below the header.
- 4. Confidentiality Notice: An optional notice about the confidentiality of the document.
- 5. Footer Text: Text shown at the bottom of each page.
- 6. Adding Logos: Upload your organization's logo to be included in the output.
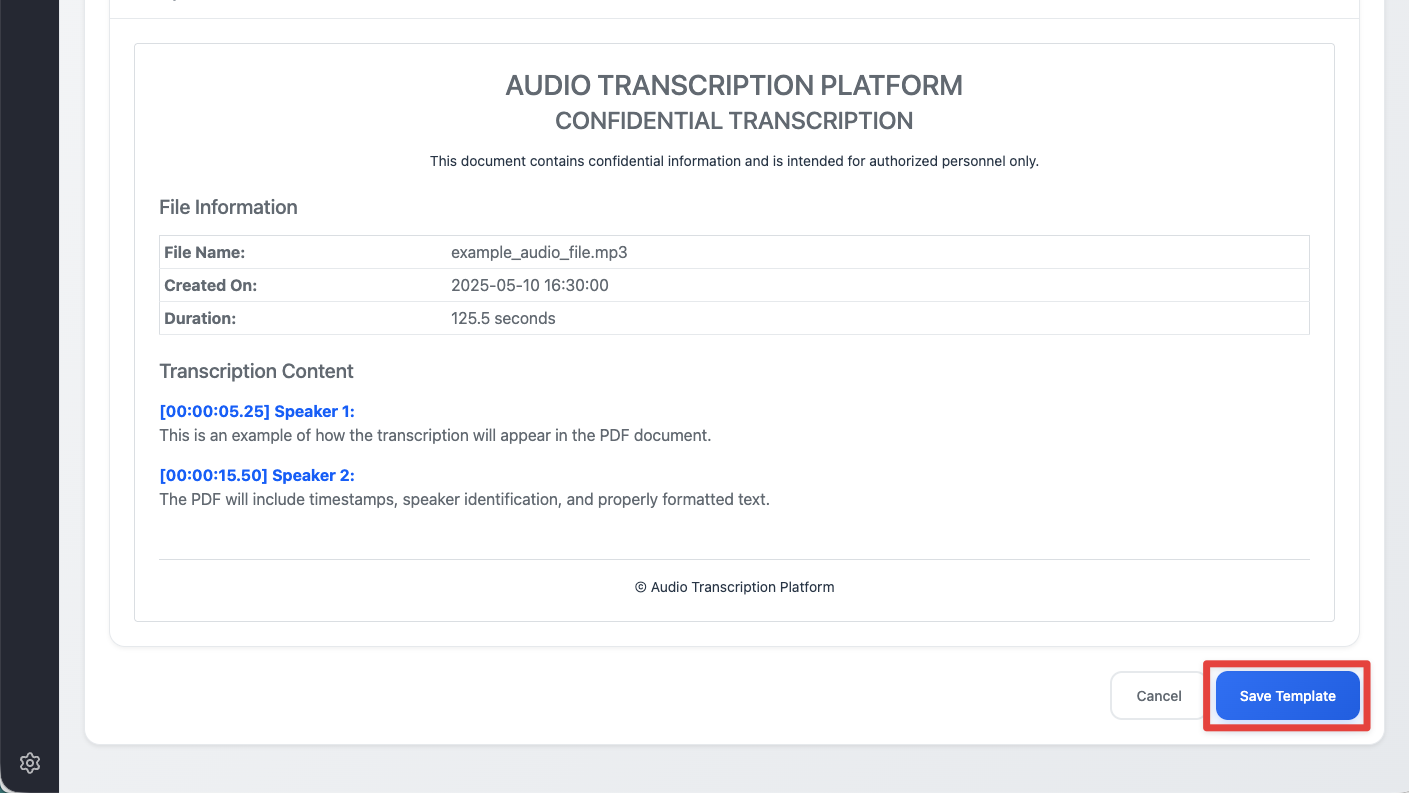
- 7. Preview Template: Review the template preview carefully to ensure it meets your requirements.
5. Save Template: Once satisfied with the configuration, save your custom template. It will then be available for selection when downloading disclosure packs.